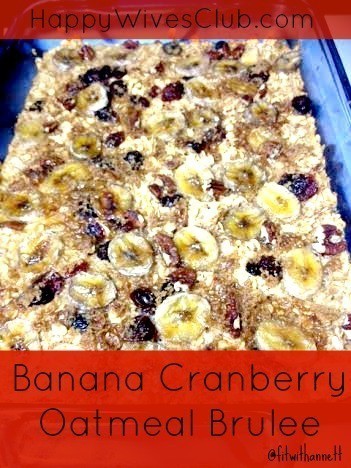
Banana Cranberry Oatmeal Brulee
In the winter time I love to eat comfort food. Not only do we eat hot delicious creamy meals for dinner, I also like to eat warm food for breakfast.
Being a fitness advocate, I advise my clients to eat healthy whole grains and whole foods, like whole oats which are going to not only fill them up, but more importantly nourish their body.
Oatmeal is known to be a heart healthy meal. Not only is it yummy, but it lowers the LDL (bad) cholesterol level.
Not only does it help with lower cholesterol, but it also helps with high blood pressure, type 2 diabetes, and helps to keep your weight low.
Being high in fiber, low in fat, and high in protein food, another benefit of oatmeal is that it makes you feel full longer. This is a great benefit if weight loss is your goal.
Just because I’m a virtual fitness coach doesn’t mean I don’t enjoy amazing meals. I just tweak them to make them better for me. This oatmeal brulee will make your taste buds jump for joy!
If you love the taste of an oatmeal cookie, you’ll love the brown sugary, nutty, cinnamon, cranberry, and creamy taste of this delicious comforting, yet healthy meal.
Banana Cranberry Oatmeal Brulee

- 2 cups oatmeal
- 1 3/4 cups milk
- 1 tsp vanilla
- 1 1/2 tsp cinnamon
- 1/4 tsp sea salt
- 1 tsp baking powder
- 1 whole egg
- 1 egg white
- 1/4 cup brown sugar (sucanat, or coconut sugar)
- 1 tbs organic grass fed butter
- 8 walnuts halved
- 1/4 cup dried cranberries
- 1 medium banana
Grease a 9×13 dish with butter. Preheat oven to 350 degrees.
In a small bowl whisk together the eggs. Using a large bowl combine the oatmeal, milk, vanilla, cinnamon, baking powder, salt. Add the eggs to this mixture, along with the walnuts and cranberries.
Pour the oatmeal mixture into the lightly greased baking dish. Top with sliced bananas.

Bake for 35 minutes or until golden brown. Remove from oven after 35 minutes and sprinkle the top evenly with the sugar. Put back into the oven under the broiler for about 1 1/2 – 2 minutes until the top is a light brown crunchy top, resembling creme brulee. If you have a brulee torch have fun and use it instead. (If you like your oatmeal creamy, add a touch of milk to your bowl before serving.)
For more great recipes, visit me at Fit Moms Fit Kids Club.
Have a healthy day,
Annett


High Protein Apple Pie Smoothie (No Powder!)

Apple pie is a favorite dessert when the weather turns cold. Slightly sweet apples mixed with cinnamon, nestled between two flaky, buttery crusts is the perfect way to end a meal with fresh, seasonal fruit.
Unfortunately, meals seem to be a bit bigger and a bit heavier this time of year and tummies often don’t have enough room after dinner to fit even a small slice of pie.
Plus, if we’re being honest, we’ve probably already eaten more than our fair share of homemade cookies!
Instead of skipping dessert, or over-indulging in too many sweets, why not have apple pie for breakfast? This smoothie tastes just like dessert, and as a healthy bonus, it has over 20 grams of protein!
This high protein apple pie smoothie is from my new eBook, High Protein, No Powder: Protein Bars and Smoothie Made with Real Food. High Protein, No Powder.
My healthy cookbook explains the dangers of processed protein powders, teaches you how to make protein bars and protein smoothies with real food.
It also offers over 30 delicious recipes to get you started as soon as you get rid of the fake powders.
High Protein, No Powder will be officially released in January, but you can get a sneak preview with this apple pie smoothie recipe. Now you can indulge in dessert any time of day!
High Protein Apple Pie Smoothie
1 cup kefir
1/2 tsp vanilla extract
1/2 cup white beans
1 cup loosely packed spinach
1/2 cup banana
1 1/2 cups peeled apple
1/2 tsp cinnamon
1/4 tsp nutmeg
1/4 cup coconut water or whey (optional)
Add the ingredients in the order listed to a blender and process. Repeat if necessary to ensure smooth consistency. Serves 1.
Have a blessed day! Tiffany @ Don’t Waste the Crumbs
Lemony Garlic Green Beans

Thanksgiving dinner wouldn’t be complete without a side of deliciously prepared fresh green beans!
Although green bean casserole is a classic favorite, for those with certain food allergies (or those counting calories), it’s not the best option to put on the table.
That’s why we love this simple, yet delectable dish that truly showcases the flavor of fresh green beans. In fact, this easy-to-make recipe is one we enjoy over and over throughout the year!
It’s just one of the many healthy, whole food Thanksgiving recipes I’m sharing over at The Nourishing Home this month. We hope you and your family enjoy it too!
Lemony Garlic Green Beans
2 pounds fresh green beans
2 tbsp butter, plus 1 tbsp olive oil (if DF, use 3 tbsp olive oil)
1-2 cloves garlic minced
2 tsp lemon zest
sea salt and pepper to taste
Snap off ends of green beans and rinse well; set aside. Prepare an ice-water bath in a large bowl. Bring a stockpot of salted water to a boil.
Add green beans to boiling water and cook until color is set and green beans are tender, about two minutes. Drain and transfer beans to ice-water bath to stop cooking. Drain again; set blanched green beans aside.
Melt butter in a large skillet over medium heat. Add the minced garlic and sauté until just fragrant, about one minute. Then, add the blanched green beans and lemon zest. Toss to well coat and rewarm the beans. Season to taste with sea salt and pepper. Transfer to a serving platter and enjoy! Serves 5-6.
Happy Thanksgiving blessings to you and yours,
Kelly at The Nourishing Home
Frugal Side Dishes {sauteed cabbage}

Cabbage is a great winter vegetable. It’s in season, abundant at most local markets, and cheap!
We love cabbage and use it to make sauerkraut, coleslaw, and I’ve even used it to cure mastitis. But my favorite thing to do with cabbage is to keep it simple and saute it in olive oil with an onion and a clove of garlic.
It’s filling and full of vitamin K and vitamin C, perfect for when you’re trying to keep the winter time sniffles away. Did I mention it’s full of fiber? At just .40-.50 cents a pound cabbage is one of the cheapest winter vegetables and it stores well!

Ingredients:
- 1/2 head large cabbage, shredded
- 1 onion, chopped
- 1 clove garlic, minced
- 2 tablespoons olive oil
Instructions:
- In a large skillet add the oil, and onions. Saute for 1 minute over medium heat.
- Add cabbage and garlic, saute for 5 minutes.
- Stir and cover skillet, cook for 8 minutes.
- Uncover, stir and let cook for 3-5 more minutes until water is evaporated and cabbage and onions are lightly browned. Serve hot.

What’s your favorite way to enjoy cabbage?
Sandi’s Delicious Pulled Pork Sandwiches

Less than a year after we were married, my husband and I decided to move into a house with my sister, brother-in-law and their newborn baby.
We saw this as a way to spend time with some of our best friends, as well as a way to save money for the future.
One of the benefits of having roommates, and there were many, was sharing the cooking responsibilities.
Each couple would buy their own groceries, but we usually planned at least 2 nights a week when we would cook for everyone. It was a fun way to try out new recipes or to eat favorites that were usually made by the other couple.
One of our favorites was my sister’s recipe for pulled pork sandwiches. Yum! I would like to say that it is fast, but since this is a slow cooker recipe it does take some time.
This is a good one to set up right before you go to work in the morning or before you start running your errands for the day.
Since we’ve moved out of that house (and out of the state!) this recipe still shows up on our menu at least once a month thanks to my sister!
Sandi’s Delicious Pulled Pork Sandwiches
Ingredients:
- 1 to 1½ lbs Pork Tenderloin
- 1 tsp salt
- 1 tsp black pepper
- 1 ½ tsp cinnamon (optional, but trust me- it’s good!)
- Beef stock (I usually buy 32oz and use enough to cover the pork in the crockpot)
- Your favorite BBQ sauce
- Bread, buns or rolls (I recommend King’s Hawaiian Sweet Rolls!)
Directions:
- Cut off any excess fat from the pork tenderloin
- Season pork with salt, pepper and cinnamon
- Place pork in crockpot and add enough of the beef stock to cover the pork. If you don’t have enough, at least cover half of the pork and turn it over halfway through cook time.
- Cook covered on low for 8 hours
- After pork has finished cooking, remove pork from crockpot and drain juices.
- Pull pork – I normally put the pork in a 9×13 dish and use two forks, but that’s just me. I’ve found it easier to remove from the crockpot, pull it apart and return it to keep it warm.
- After pork has been pulled apart, add desired amount of BBQ sauce – coating evenly.
- Add pork to your favorite bread or roll and eat up
Enjoy!
Roasted Butternut Squash “French Fries”

Warning: This recipe is not French, nor fried, and there are no potatoes in sight.
In fact, it is made up entirely of a single orange vegetable with a strange name and nothing else. But I’m willing to bet your kids, and hubbie, will eat it up as if it were otherwise!
I stumbled upon this phenomenon known as “French fried (insert food here)” earlier this year when I asked my daughter what she wanted for lunch.
She gave her standard answer (chicken nuggets and French fries with ketchup) and I gave my standard answer (we don’t have nuggets or fries, and you can’t have just ketchup for lunch).
I wondered though… Could I make something else, call it a French fry and still earn smiles at the table? Perhaps involving the kids in a small game of pretend by even serving ketchup?!
Sure enough, my hunch was right. Follow this simple formula for getting kids (and picky parents) to eat their veggies without anyone questioning your motives:
- Slice any vegetable into strips
- Toss in oil, season and roast them in the oven
- Serve it to the family
- Call it a (insert food) French fry
- Ask if they would like ketchup with their fries
Of course this method works for potatoes too, but why not branch out and try to get the family to eat a variety of vegetables? Use this pocket guide to purchase seasonal vegetables, put this easy side dish on the menu each week and aim to serve a different color. Any vegetable would pair perfectly with delicious Panini-style grilled sandwiches – a frugal way to enjoy a sandwich and fries, any time of year!
INGREDIENTS
1 medium butternut squash
1/4 cup olive oil
2 Tbsp Italian seasoning
Coarse salt & pepper
METHOD
Wash and scrub the squash with all-natural produce wash. Preheat oven to 400 degrees.
Cut off the long, skinny neck of the squash, just where it meets the large, round base. Trim off the tough outer skin of the squash. (If the squash is awkward to handle, try cutting the long neck in half first.)
Cut the squash in quarters length-wise, and cut the remaining pieces into thick strips (similar to potato steak fries).
Scoop out the seeds from the round base of the squash, trim off the tough outer skin and cut this portion into thick strips as well.
In a large bowl, combine squash with olive oil and coat thoroughly. Generously grind salt, pepper and Italian seasonings and stir to combine well. Spread evenly over a cookie sheet and roast at 400 degrees for approximately 30-40 minutes, turning every 10-15 minutes, until the squash is cooked through.
Note: Turning the squash encourages even cooking. The squash will likely not be crispy and firm, so use caution. You want them to remain intact for the “French fry” effect!
Have a blessed day! Tiffany @ Don’t Waste the Crumbs
Slow-Cooker Apple Butter

Wake-up to the glorious aroma of homemade apple butter with a simple recipe that captures the flavors of fall!
So easy to make, just pop all of the ingredients into your crockpot before bed and wake up to a special treat your whole family will love!
Homemade apple butter makes a delightful spread for toast, biscuits and muffins, as well as a delicious topping for pancakes and French toast.
Apple butter also makes a great appetizer – either as a dip served alongside graham crackers and fresh fruit slices – or you can place a thick layer of apple butter on top of a block of cream cheese and serve it alongside your favorite crackers. Yum!
And, with the holidays fast approaching, homemade apple butter also makes a delicious and thoughtful gift!
Easy Slow-Cooker Apple Butter
10 large apples (I prefer a mix of sweet and tart apples)
2 cups unfiltered apple juice
1 1/2 cups pure dark maple syrup
1/4 cup fresh-squeezed lemon juice (about 2 small lemons)
1 tsp ground cinnamon
1/4 tsp ground nutmeg
1/4 tsp ground ginger
1/4 teaspoon sea salt
1/8 tsp allspice
Peel and core apples. Then cut them into bite-sized pieces. (One large apple yields approximately one cup of cored diced apples. So if you’re using small or medium apples, simply use about 10-12 cups of diced apples.)
Add the diced apples to the crockpot. Then add all remaining ingredients. Stir well to combine. Cover and cook on high for one hour, stirring once or twice. Mixture should be bubbly after an hour. If not, allow it to continue to cook until it comes to a bubbly simmer. Then reduce heat to low and cook the apples an additional hour.
Remove the cover, stir the mixture and then set the cover back on slightly ajar, so some steam can escape during the remainder of the cooking time. Then continue to cook the apple butter on low (with cover ajar) until it’s dark brown and thick (about 8-9 hours).
Turn off the crockpot, stir the apple butter and then allow it to cool to room temperature. If you prefer a smooth (less chunky) apple butter, use an immersion blender, or place the apple butter in a food processor for a quick whirl, to create a smoother texture.
Then, transfer the apple butter to half-pint or pint-sized mason jars. Makes 12 half-pint or six pint-sized jars. Store in refrigerator for up to two weeks. (Or you can preserve the apple butter longer using the classic hot water bath canning method.)
Happy Fall Blessings to you and yours!
Kelly @ The Nourishing Home
Peanut Butter Apple Rings {kid friendly}

This is an easy kid friendly, adult friendly, and husband friendly snack.
When I need a quick and healthy snack to feed a crowd I break out the apples, peanut butter, coconut flakes, chocolate chips, and nuts and call the kids to help assemble.
It’s a great way to get the kids in the kitchen to learn some culinary skills, socialize with mom, and just have some fun together.
There is no strict recipe for this snack and when your creative juices get flowing it can be quite fun to see how many variations you can come up with.
Peanut Butter Apple Rings
Ingredients:
- all natural peanut butter
- apples, sliced into rings
- unsweetened grated coconut
- chocolate chips
- nuts: pecans, walnuts, almonds, peanuts (optional)
Instructions:
-
Spread peanut butter on sliced apples and top with your favorite toppings.
Easy huh? I generally slice the apples and let all the kids have fun assembling, even down to the 18 month old who tends to eat more than he assembles. It’s a great way to get those 3, 4, and 5 year olds to fine tune those motor skills and help mom and dad in the process, giving them a sense of self-worth and responsibility.

Call the kids into the kitchen, make some peanut butter apple rings and then take them to your play date, or take a plate full to daddy and watch your kids beam with pride as they see the fruit of their hands being enjoyed by others.
Check out these other great snack ideas to fill those ever hungry tummies.
What’s your child’s favorite snack?
Blueberry Vanilla Muffins {gluten-free}

Who doesn’t love blueberries? In July we loaded up the kids and went blueberry picking. It didn’t last long.
The kids were hot and the thrill wore off faster than I would have liked. But we did come away with 15lbs of blueberries when it was all said and done.
We ate some fresh, others we froze in anticipation for use in other recipes like smoothies, oatmeal, and muffins!
One of my favorite muffin recipes I am sharing with you today, blueberry vanilla muffins. Blueberries are good for so many reasons. Yes, they taste good and generally are a kid (and hubby) favorite.
Did you also know they are packed full of anti-oxidants and micro-nutrients? They contain vitamin C, vitamin K, manganese, and don’t forget the fiber!
Blueberries are often over sprayed with pesticides so look for organic berries or low spray berries. And if you can’t find those then enjoy what you can get in moderation.
Double or triple the recipe and store some in your freezer or fridge for an easy on the go breakfast for those busy got to get to school or work days. Simply re-heat in a warm (250 degree) oven for 10-12 minutes while you are getting ready in the morning. Or pack a frozen muffin in a lunch box for a lunch time treat (the muffin should be completely thawed by the time you or your child sits down to lunch).

Ingredients:
- 2 cups gluten-free all purpose flour
- 2 teaspoons baking powder
- 1/4 teaspoon salt
- 1/2 teaspoon gelatin granules*
- 1 egg
- 3/4 cup milk
- 1/4 cup honey
- 1/4 cup coconut oil, melted
- 1 tablespoon vanilla extract
- 1 cup blueberries
Instructions:
- Preheat oven to 400.
- In a large bowl combine the dry ingredients mixing to combine.
- In a medium bowl combine the wet ingredients and whisk together.
- Pour the wet ingredients into the dry and mix until just combined.
- Gently fold in blueberries.
- Bake at 400 for 18-20 minutes or until done.
*Gelatin is a natural food source, helps aid digestion, and great for joint health. The purpose for gelatin in this recipe is to lessen any crumble gluten-free baked goods seem to have. Don’t have gelatin on hand? Substitute xanthan gum in it’s place.
Healthy and Frugal Spinach Salad

Church potlucks are not known for their healthy fare and there’s a reason. When you’re making a dish that serves 15-20 people, the cost of ingredients quickly add up. Quality produce and meat can be expensive, so we trim those out.
Pasta and rice are inexpensive, so we add those in. Plus, there’s the unwritten tradition that potluck dishes are baked and smothered with cheese.
What we end up with is a very long table, lined up with orange 9″ x 13″ rectangles and everyone playing the “guess what’s inside” game.
I strive to bring a vegetable to every potluck, but I’m often low on frugal ideas that feed the masses. My luck turned one day when I flipped over a bag of kale from Costco.
The recipe on the bag was inspiring, but honestly, it used expensive ingredients: sun-dried tomatoes, bacon and pine nuts? Those are too rich for my potluck budget.
With some easy substitutions and using ingredients I usually have on hand, I’ve created a healthy and frugal salad that is just as tasty with plenty of nutrition!
- Spinach is a nutrition powerhouse, can be purchased in bulk and extras can be used at home in smoothies.
- Sunflower seeds are a good source of protein and more affordable than many cuts of meat.
- Onion adds a bit of crunch and jazz, while sweet, juicy tomatoes add a bit of fun.
- A sprinkle of Parmesan cheese adds a touch of class!
Be a rebel with me and break the rules. At the next potluck, let’s bring something that’s completely opposite of tradition: fresh, frugal, green and delicious! This spinach salad is just what every potluck table needs. And who knows – maybe this one will spark a new tradition!
Healthy and Frugal Spinach Salad
4 cups of spinach, washed and dried (use this frugal, all-natural produce wash)
1/4 cup sunflower seeds
1/2 cup cherry tomatoes, halved
1/4 cup shredded Parmesan cheese
1/4 red or white onion, sliced thinly
1 cup cooked, chopped bacon (only if the budget allows!)
Dressing
1 clove garlic, crushed
2 Tbsp lemon or orange juice
1/2 cup olive oil (guide for buying/testing quality oil)
salt & pepper
Combine the salad ingredients in a large bowl. Combine the salad dressing ingredients in a glass jar and shake together vigorously, or in a shallow bowl whisk together well. Saturate the salad with the dressing and allow to stand for 15-30 minutes for the dressing to permeate the salad. Toss again before serving.
Have a blessed day! Tiffany @ Don’t Waste the Crumbs
Mandarin Orange Cheesecake

Every wife should have a stash of “go-to” recipes she can make for whenever a certain occasion arises.
- simple baked chicken that pleases even the pickiest dinner guest
- healthy pasta salad made with whatever is inside the fridge for a last minute potluck picnic
- easy homemade artisan bread for the hostess who really doesn’t need any more gifts
The one recipe that I believe trumps all other recipes in the arsenal is the cheesecake. This light, creamy dessert compliments all genres of food and pleases nearly every palate.
Crusts can range from crushed cookies to chopped nuts or skipped altogether. Fillings can be “classic” or dressed up for a unique twist. Toppings can be thin, thick, mixed with the batter or left off for a strawberry puree topping instead.
After many failed attempts, this mandarin orange cheesecake is a simple variation of my official go-to recipe.
With two minor changes, this can become a delicate vanilla bean cheesecake. A slightly different swap creates a strawberry key lime cheesecake. The substitutions are easy and limitless, making this the perfect cheesecake to add to your collection.
Mandarin Orange Cheesecake
Crust
1 cup nuts (any combination)
2 Tbsp butter, melted
Filling
24 oz full-fat cream cheese, room temperature
1 cup granulated sugar
2 large eggs, room temperature
4 mandarin oranges, zested and juiced*
Topping
1 cup full-fat sour cream
1/4 cup granulated sugar
Preheat the oven to 350 degrees. Butter and lightly flour the bottom and sides of a 9″ springform pan.
In a food processor, pulse nuts until finely chopped. Add melted butter and pulse until ingredients are combined well. Press the nut mixture evenly into bottom of prepared springform pan. Bake crust for 10 minutes; cool on a wire rack.
In a large bowl, beat cream cheese on low until very creamy, taking care not to whip air into the cheese. Scrape down sides and add sugar, beating on low until smooth. Scrape down the sides and add one egg at a time on low, beating until fully incorporated and smooth. Finally, add mandarin orange zest and juice, beating on low until smooth and fully incorporated.
Pour filling into cooled pie crust. Place unbaked cheesecake in the oven and cover with a cookie sheet; bake for 20 minutes. Uncover the cheesecake and continue to bake for 20-30 minutes, until center is set but slightly jiggly like Jell-o. Remove cheesecake from the oven and cool for 10 minutes.
In a small bowl, combine sour cream and sugar. Spread over still warm cheesecake and bake for 5 minutes. Cool to room temperature before storing covered in the refrigerator.
Cheesecake is best when prepared the day before.
*Substitute all of the juice and zest for another fruit or extract to create your own family favorite flavors!
Have a blessed day! Tiffany @ Don’t Waste the Crumbs
Healthy Yet Yummy: Chicken and Spinach Pesto Lasagna

I spotted this recipe and tweaked it a bit to fit my budget (cottage cheese instead of ricotta, for one thing; omitting the chicken is another option). Not only is it a keeper, it is often requested for birthday dinners around my house. And with ten kids, that’s a lot of birthdays!
12 uncooked lasagna noodles
3 tbsp olive oil
1 c onions
3 cloves garlic, crushed
2 12 oz packages frozen chopped spinach
3 c cooked, diced chicken
1/2 tsp salt
1/3 tsp pepper
2 c cottage cheese
1 large egg
1 1/2 cups prepared pesto sauce, plus 2 tbsp (I like Classico brand)
3/4 c grated Parmesan cheese
2 c shredded mozzarella
Preheat oven to 350. Spray 13 x 9 inch pan with nonstick cooking oil. Cook lasagna noodles according to package directions (not all brands require cooking). Heat oil in large skillet and cook onions and garlic until transparent. Add spinach and chicken and cook for five minutes. Season with salt and pepper. In a large bowl mix together cottage cheese, egg, pesto and Parmesan cheese until thoroughly blended. Add chicken and spinach mixture and stir to combine. Spread 2 tbsp pesto in bottom of prepared pan. Layer 4 or 5 lasagna noodles, slightly overlapping. Top with one third of spinach mixture and one third of mozzarella . Repeat layers two more times. Bake 35 to 40 minutes until hot and bubbly. Serves 8.
Keeping the faith (and the funny) in life with ten kids.
Aunt Vivian’s Chicken in White Wine Sauce

I have never much cared for Italian cuisine. I could leave pasta, the red sauce, and the rich meat sauce alone. Oh but this was until I met an Italian who cooks authentic Italian food. Sharon, our associate pastor and dear friend, introduced me to authentic Italian cuisine about five years ago now. I have tried the best fresh ingredients and flavors. With Sharon’s permission I am sharing this gem of a recipe!
Something I’ve noticed about Italians and the way they cook: It must be made in love! ![]()
From listening to her stories about her family and seeing her love pour out onto us I know that these dishes are more than just making a meal. It is about showing people you love them and wanting to sit down and fellowship with them.
This recipe has been my favorite thus far (and trust me, I have had some amazing dishes).
The Italian name for this dish is: Pollo zia Vivian in salsa di vino bianco which translates to…
Aunt Vivian’s Chicken in White Wine Sauce
- 4-6 Boneless Chicken Breasts
- 1 cup olive oil (approximately)
- 2 cups flour
- 1 stick butter
- 3 cloves garlic
- 1 tsp parsley
- 1/2 lemon
- 5 oz white wine (vino bianco)
- 6 chicken bouillon cubes
With a meat mallet pound the chicken breasts into flour (I put them in a ziploc bag).
Pour approximately 1/2″ of extra virgin olive oil in a large skillet. When the oil is very hot, add the chicken. Cook chicken until it turns white. Remove chicken to a separate plate.
Lower the heat and add the parsley and garlic into the pan. When the garlic turns transparent. Add the butter, wine, and the juice of the lemon letting it simmer on low.
In a mason jar (or container with a lid) add about 10-12 oz hot water & bouillon cubes, taking care to not burn your hand on the hot jar. Shake vigorously, then add 2 Tbs flour & cold water. Shake well. Add this mixture to the skillet. Pour over the chicken. Bake 20-30 minutes at 350 degrees. It should be bubbly and yummy!
This can served over mashed potatoes (that is my vote) or over pasta!
Hope you enjoy!
GET MORE RECEPIES
Aunt Vivian’s Chicken in White Wine Sauce
I have never much cared for Italian cuisine. I could leave pasta, the red sauce, and the rich meat sauce alone. Oh but this was until …
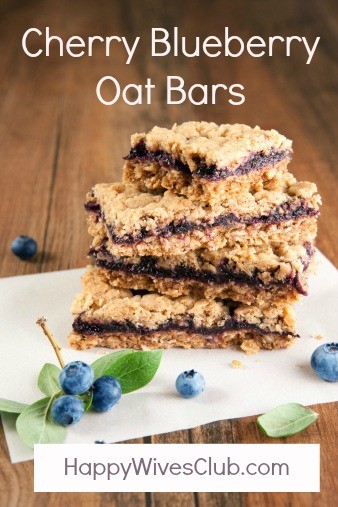
Cherry Blueberry Oat Bars
Last weekend I made it to the farm, barely, to the last day of cherry picking of the season. The large farm was almost picked clean. …
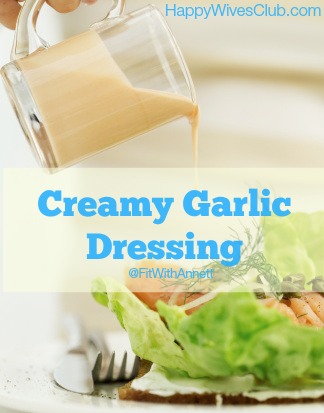
Creamy Garlic Salad Dressing
Most commercial dressings are full of unwanted sugar, salt, artificial colors, flavors, and other things your body doesn’t need. This dressing is void of all of …
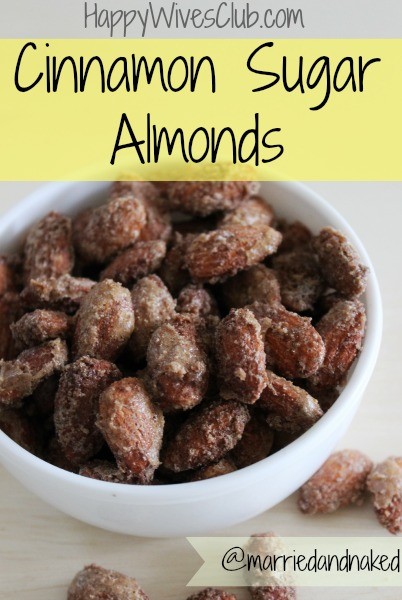
Cinnamon Sugar Almonds
I once heard someone say, “The way to a man’s heart is thru his stomach.” I believe that there is some truth to that statement. Food …

Easy Chicken Stir Fry
My dad went to culinary arts school. So growing up I had a chance to taste all sorts of creations! When I got married and started …

Sour Cream Coffee Cake
In a previous life, I was an innkeeper. My parents, my husband and I ran a family-friendly B&B that routinely hosted 30+ individuals per weekend. We …