Chicken with Butter Cream Sauce

I made this dish for the first time recently and was pleasantly surprised with how quick and easy it was. I really think what took me the most time was crushing the Ritz crackers! I don’t have a food processor so it was was just me, a zip lock bag and a rolling pin! Even so, this dish and it’s side, took less than 30 minutes from start to finish and I hope you like it!
What you’ll need:
- 1lb of chicken tenders **
- 1 sleeve of Ritz crackers (or breadcrumbs if those are on hand, but Ritz work better!)
- Olive Oil
- 4 tbsp butter
- 1 cup chicken broth
- 1 cup of half and half, plus 2 tbsp set aside
- 1 tsp thyme
- 1 tsp basil
- 1 tsp sage
- 2 tbsp cornstarch
- salt and pepper
- Grind crackers into crumbs either by hand or using a food processor.
- Cover each piece of chicken with crumbs (cover well!) and set aside.
- Add about 3 tbsp of olive oil to a large pan and cook half of the cracker crumb coated chicken for about 4-5 minutes per side or until cooked all the way through and golden brown on medium high heat. Set cooked pieces aside and cook second half of chicken strips.
- Once chicken is cooked, add butter to still hot pan. Allow butter to melt and add chicken broth to mixture.
- Whisk in cup of half and half, as well as spices and bring to a boil.
- While mixture is heating, mix the 2 tbsp of half and half with cornstarch until smooth.
- Once boiling, add cornstarch mixture and allow sauce to boil until it thickens. Remove from heat.
- Cover desired amount of chicken in butter sauce and enjoy!
I served this dish with some oven roasted asparagus and it was fantastic! While my chicken was cooking I tossed some asparagus with olive oil, salt, pepper and Parmesan cheese and put it in the oven at 425 degrees for 10-15 minutes. Dinner and sides in under 30 minutes!
Enjoy!
Nicole @ Glass on the Outside
** You can use boneless, skinless chicken breast as well, but I found using chicken breast tenders to be easier and faster!**


Mediterranean Chicken – One Dish Recipe!

Enjoy a fancy dinner date night at home with this super easy, yet exquisite dish that’s certain to WOW your hubby, and perhaps the kiddos too (if you opt to make it a family affair). One skillet meals are such a great way to put a healthy & delicious dinner on the table in virtually no time – and with minimal clean-up – making them the perfect option for easy weeknight suppers.
The great thing about this particular one-dish recipe is that it tastes even better the next day – so why not double or triple it! Simply dice-up the extra chicken & veggies and either roll them up in a tortilla for a delicious lunch wrap, or toss them together with some pasta to create a quick-n-easy Mediterranean Chicken Pasta dinner later in the week!

P.S. Getting a great meal on the table quickly and effortlessly is a snap when you commit to some good ol’ fashioned planning and organization in the form of “Mise en Place” – the secret to increasing efficiency and success in the kitchen!
Quick & Delicious Mediterranean Chicken – One Skillet Meal!
Serves 2 (recipe can easily be doubled or tripled for more servings)
Ingredients:
1 large boneless, skinless organic chicken breast (cut in half as directed below)
3 tbsp olive oil, divided
1 14-oz can of artichoke hearts (drained, cut into halves & patted dry)
1 small red onion, cut into wedges
1/4 cup sundried tomatoes in oil (drained and thinly sliced)
3-4 cloves garlic (thinly sliced)
1 tsp dried oregano
1/2 cup chicken stock (homemade is best!)
1/4 cup fresh organic basil (cut in strips)
1/4 cup pitted kalamata olives
1/4 cup crumbled feta cheese
Enjoy a Healthy & Delicious Dinner in 3 Easy Steps:
1. Carefully cut the chicken breast in half horizontally to create two thin breasts. Season both sides with a dash of sea salt and freshly ground black pepper. Preheat large skillet over medium-high heat. Once skillet is hot, add 2 tablespoons of olive oil and chicken breasts. Cook chicken about 3-4 minutes before turning, until bottom is lightly golden brown. Then, turn chicken and cook on the other side until golden (about 2 minutes). Transfer to a plate and cover.
2. Add the remaining 1 tablespoon of olive oil to the skillet, along with the artichoke hearts and red onion. Cook about 1-2 minutes until golden brown. Then, continue cooking another 2-3 minutes, stirring occasionally, until onion begins to soften. Add the sundried tomatoes, sliced garlic and oregano, along with a dash of sea salt and freshly ground pepper. Continue to sauté about 1-2 minutes until garlic softens.
3. Next. add the chicken stock, basil and olives. Return chicken breasts to the mixture, cover and allow to simmer about about 3 minutes until chicken is cooked through. Divide chicken and veggies onto two plates and top with a sprinkling of feta cheese. Serve with a mesclun salad, crusty bread with butter and a glass of sparkling water. Enjoy!
Recipe Note: This dish tastes even better the next day – so why not double or triple it to make even more great meals FAST! Simply dice-up the extra chicken & veggies and either roll them up in a tortilla for a delicious lunch wrap, or toss them together with some pasta to create a quick-n-easy Mediterranean Chicken Pasta dinner!
Do you do date nights at home? If so, what are your favorite at-home date night ideas?
Cucumber Dill Salad

This refreshing salad was inspired by our favorite local German restaurant. We recently went there for lunch and I was craving something fresh to go along with my schnitzel sandwich. I’d never had their cucumber salad, so I tried it, and it was quite tasty!
But when we were done eating, I leaned into my husband and whispered with a mischievous smile, “I bet I could make it better.” I didn’t say this to brag, or because the German restaurant’s version wasn’t yummy, because it was. I only said it because I happen to believe that homemade food is almost always better than the food we eat in restaurants (other than, perhaps, the really great ones). I also said it because I wanted to have that cucumber salad again, adjusted just slightly to my own taste buds, and so I put myself up for a bit of a fun challenge.
I don’t know exactly what the German restaurant uses in their recipe–apparently it’s a secret!–but I knew I wanted to use yogurt as my creamy base (cucumber and yogurt are a classic duo) and a light vinegar to give the cucumbers some brightness and tang. A touch of sugar takes away the pucker and the dill lends an earthiness to the fresh, mild taste of the cucumbers. This is a beautiful salad to serve as we head into the warmer months, and it would go perfectly with anything from Indian curry to summer barbecue.
1 cucumber, sliced as thinly as possible
2 Tb. fresh dill, chopped
2 Tb. champagne vinegar (or white wine vinegar, or any light vinegar)
3 Tb. plain, whole milk yogurt
2 ½ tsp. sugar
Salt and freshly ground pepper, to taste
Combine the cucumber and dill in a medium bowl. In a small bowl, whisk together the champagne vinegar, yogurt, and sugar. Pour the dressing over the cucumbers and lightly stir. Season to taste with salt and freshly ground black pepper. You can serve this immediately, or let it marinate in the fridge for several hours or overnight. Garnish with more fresh dill and freshly ground pepper (optional).
Serves 4 people as a side dish.
Cinco de Mayo: Mexican Chicken Pizza

Let me start off by saying that at my bridal shower almost five years ago, my amazing mother-in-law gave me a gift that has been worth its weight in gold- a cookbook full of my husband-to-be’s favorite recipes! I think this should be a standard gift because oh my goodness, it’s been fantastic!
I remember him flipping through it saying, “I love that” and “oh man, I love that!” on every page! I know that on any given day I can open this cookbook and bam- something he’d love to eat.
This is another quick meal, assuming you are like me. When I know I’ll need any kind of cooked chicken, I tend to prep it at the beginning of the week. I cook all my chicken breasts so that on the day I need it I can shred it, cube it, ect. This has saved me tons of time!
This meal, once chicken is cooked, should take approximately 5 minutes to assemble and the best part is you can add whatever you want to it! I like to add different spices to it and some hot sauce as well, but this should be as quick as tossing ingredients on pizza dough and sticking it in the oven.
So here you go- Mexican Chicken Pizza courtesy of my mother-in-law, Shari!
Mexican Chicken Pizza
What You’ll Need:
- Pizza crust (I use a ready-made)
- ½ tsp. chili powder
- ¼ tsp. garlic salt
- ¼ cup sliced black olives
- 1 ½ cups shredded Monterey Jack cheese
- 2-3 tbsp. chopped green chilies, drained
- Salsa
- 2 cups cubed, cooked chicken
- ½ tsp. cumin
- ½ cup chopped tomato, drained
- ¼ cup finely chopped onions
- 1 cup shredded cheddar cheese
- 1 avocado, peeled and sliced
- Pre-heat oven to 425 degrees.
- In a large bowl, combine chicken, chili powder, cumin and garlic salt, mixing well.
- Spoon chicken on to dough evenly. Top with tomato, olives, onions, green chilies, Jack and cheddar cheese.
- Bake at 425 degrees for 20-24 minutes, or until crust is golden brown.
- Serve topped with avocado and salsa.
Your finished product should look something like this:
Enjoy!
-Nicole @ Glass on the Outside
Best Kale Salad Recipe

I love Kale, it is by far one of my favorite foods on the Planet as well as being one of the healthiest foods on the Planet. I love it as a pesto, I love it as a juice, I love it sautéed with garlic and olive oil and I especially love it in my favorite salad.
Kale is high in Vitamin A, C and K. It is also hailed for its antioxidant and anti-inflammatory qualities which have been known to work together to prevent cancer. It is also high in fiber, lowers one’s cholesterol, and helps with the body’s detoxification process.
YOU WILL NEED
- A BIG Bunch of Organic Lacinto Kale,
- A handful of Organic Pine Nuts,
- A handful of Organic Sultanas (Raisins),
- Parmesan Cheese if you eat dairy, if not I use Brewers Yeast,
- Sea Salt (amount used is up to you).
FOR THE DRESSING
- 1/3 of a cup of Olive Oil,
- One whole Organic Lemon juiced,
- 6 Crushed Organic Garlic cloves,
- Pepper
- 1/4 of a cup of Red Wine Vinegar,
- 2 tablespoons of sweetener of your choice – Agave, Honey or Maple Syrup.
THE RECIPE
- Combine all ingredients for the dressing, and thoroughly whisk until it looks creamy. Set aside.
- Cut the kale into fine ribbon pieces and place in bowl.
- You then need to salt the kale by sprinkling through and massaging in. This is important, as it will marinate the kale so it becomes tender. The longer you can leave the kale in the salt the softer it will be (20 minutes at least).
- Pan fry the pine nuts on a low heat until they are slightly crispy, this usually only takes a few minutes.
- Mix in the Sultanas and Pine Nuts with the kale and mix well.
- Add dressing, making sure it is evenly distributed.
- Add either shaved Parmesan cheese or Brewers Yeast as garnish.
- Serve, Eat and quickly realize you did not make enough kale and you are going to have to start all over again.
There is NEVER enough of this to go around, and I could honestly eat it every day.
Butter Bean Dish

It is said that people either LOVE or HATE lima beans, also known as butter beans. I am definitely a lover of lima beans. They are a great source of protein and high in calcium and manganese which helps to maintain healthy strong bones. They give you energy, are high in iron (another plus if you do not eat meat), are low in calories and almost fat-free. Want more inspiration? Butter beans are high in fiber and bind with the bile acids in ones’s body thus lowering your cholesterol, which happens when the two leave together exiting the body. Lima Beans also help keep you regular by aiding your digestive tract.
Besides all of this, you can make really yummy dishes with Lima Beans like this recipe I am highlighting here – Lima Beans with Olive Oil, Rosemary, Sage and dried chillies. It does take a few hours to make and there are a few different steps, but is fairly easy and generously serves 4 adults. It will also stay in the fridge for a few days with no worries at all. If you find it dries out you can add some olive oil on top before serving.

WHAT YOU NEED
- 2 Cups of Dried Organic Lima Beans
- 3 Cups of Organic Vegetable Stock (I used Nature’s Promise)
- A bunch of organic garlic cloves (I used around 15)
- A big bunch of Organic Sage (which I took from our garden)
- A big bunch of Organic Sage (which I took from our garden)
- 4 Long Dried Chillies
- Quarter of a Cup of Organic Olive Oil
- Sea Salt and Pepper to taste
- A pot that you can put in the over to cook (we use Le Creuset cooking equipment in our house)
RECIPE
- First of all soak the Lima Beans, doing this will help to remove indigestible sugars that can cause flatulence. To do this, place the raw Lima Beans in pot generously covered with water and let the beans boil for 10 minutes
- Remove from heat and let the beans sit in the water for around an hour, making sure they are entirely covered in liquid
- Once an hour has passed, drain in colander and rinse in cold water
- Preheat your over to 350F
- Put beans back in pot and cover with vegetable stock, return to flame and high simmer for 30 minutes
- Remove pot from heat
- Add all ingredients besides the salt, stir and place in oven. If you do not have a lid that is suitable to go into an oven aluminium foil works just as well
- Cook for one hour
- Add salt at the end if you feel the need
- Presto, you just made some melt-in-your-mouth beans. Give yourself a pat on the back!
Please feel free to add comments or questions to the bottom of this post, I would LOVE to hear from you!
Healthy Homemade Guacamole

Oooh how I love to serve up a healthy, vitamin packed, yet tasty meal for my family…but sometimes picky eaters can spoil the whole thing! Except when you serve healthy foods that look TOO GOOD TO EAT! This Healthy Homemade Guacamole is so Yummy and so easy to make! Serve it up as an appetizer with chips, top a Taco Salad or spread a generous amount onto your fave sandwich! Any way you serve it up..your gonna love it!
Nutritious Avocado Facts
- Packed with Protein
- Boost’s levels of the “good” cholesterol HDL
- rich in omega-3’s
- With unique combinations of Vitamins, Minerals and omega-3 fatty acids – Avocado’s help guard against inflammation
- Excellent source of carotenoids..think eye health, Immune system AND Reproductive System!
Not to mention the other healthy ingredients – like Garlic! YUM! You’ve just got to try it!
This Recipe makes 1 Cup of Guacamole (for more just double, triple etc.)
Ingredients:
- 1 Avocado – slightly ripened (not mushy..just barely squeezable)
- ½ Tbsp. Fresh squeezed Lemon or Lime – you don’t really have to use fresh
- ½ Tsp. Minced Garlic – Fresh or from a jar
- ¼ Cup Onion finely chopped
- 1 roma tomato – seeds removed
- 1 Tbsp. Fresh Cilantro
- ½ Tsp. Jalapeño Pepper
- Salt and Pepper to taste
- Optional Ingredients: Water Chestnuts for a little crunch! Splash of Tabasco or any kind of Hot Sauce, 1/8 tsp. or less of Cayenne Pepper
- Also..don’t hesitate to delete any of the ingredients above if you hate. Except the Avocado
Peel Avocado and remove pit.
Put into bowl and mash (I use a Pastry Cutter)
Add: All the rest of the ingredients and stir! Hate to Chop? You can also make this in a small food processor
Now how easy is that!!
Caution: When cutting Hot Peppers of any kind you should wear gloves. Peppers can burn your skin!
Best if refrigerated for at least an hour. Yum, Yum, Yum..ENJOY!
An original recipe from Shari Lynne @ Faith Filled Food for Moms
Oatmeal Cake

My very first friend I made when I moved to Vermont introduced me to
this recipe. It is quick and easy and oh, so yummy. What’s more,
oatmeal, walnuts and just a touch of cocoa qualify it for the healthy
category.
Make sure you make it when the family is home so you don’t have to
babysit it all alone–you will never outlast it. And resist the
temptation to add more than 1 tablespoon cocoa. It’s all you’ll need.
Oatmeal Cake
1 3/4 cup boiling water
1 cup oatmeal
1 cup brown sugar
1 cup sugar
1 stick butter or margarine
2 eggs
1 3/4 cup flour
1 tsp soda
1/2 tsp salt
1 tablespoon cocoa
12 oz chocolate chips
3/4 cup chopped nuts, optional
Put oatmeal in boiling water and remove from heat. Let stand ten
minutes. Add margarine and sugars, stirring until margarine melts.
Add egg and mix well. Sift dry ingredients and add. Add half the
choc chips and spread batter in 9 x 13 pan. Sprinkle other half of
choc chips and the nuts on top. Bake at 340 degrees for 40 minutes.
Aunt LaLa’s Chicken Wraps

I love chicken! You may not know me but everyone around me certainly knows I love it! So I’m always looking for new ways to change it up and be creative! Since being healthy is a big focus in my home these days I wanted to come up with a recipe that not only was yummy but good for me too! I love to make a recipe of my own and I think these wraps are the ideal things for that! You can put in as much or little ingredients as you want while the flavors blend together giving you a tasty healthy meal! Plus, if you’re not a big cooker (like me) you need something easy and simple to do! And ingredients you can pronounce, am I right? So go ahead and try this! It’s a new staple in my house!
(Makes 4 wraps)
Ingredients:
- 3 boneless chicken breast frozen
- lemon pepper salt (approx 1 tsp per chicken breast)
- coarse black pepper (depending on your taste)
- 1 bottle of Kikkoman teriyaki base and glaze
- 1/2 bunch of fresh cilantro
- 2 tablespoons of lime juice
- 4 regular home style tortilla shells (the burrito or regular size)
Directions for Chicken
- Pre-heat oven 425-450 for approximately 40 minutes. My chicken was frozen so if thawed cooking time will be less.
- Before cooking poke holes in chicken then season the chicken with lemon pepper and black pepper
- After chicken is cooked drizzle teriyaki sauce on your chicken
- Turn off oven and place chicken back in oven
- Make your cilantro topping while chicken is warming in the oven
Cilantro-Lime Topping
- Take your ½ bunch of cilantro and chop it finely
- Add 2 tablespoons of lime juice
- Mix it in bowl
- Warm tortilla shells according to the bag/container
- Cut chicken into strips
Now you can put your wraps together with as much cilantro as you like or add more teriyaki. Remember the great thing about this recipe is that you can add or take away different things, make it your own!
Staying Hopeful,
Lauren @ Aunt LaLa
God Bless That Man!

I love my husband. He’s the most wonderful, supportive and loving person I’ve ever known. And I know he loves me if for no other reason than his enormous patience.
When Keith and I married, I didn’t cook. I knew how to cook (following a detailed recipe to the “T”) but just thought it was a big ole’ waste of time. A few months into our marriage, I decided I wanted to make him a delicious dinner. So many people gave me cookbooks as a wedding present (including Keith ![]() ) so I figured they must be trying to tell me something.
) so I figured they must be trying to tell me something.
So I pulled out the cookbook with the most interesting cover, best colors and pictures throughout and decided that would be the day I’d cook for my honey. The cookbook I chose…drumroll please…Emeril Lagasse’s, “From Emeril’s Kitchen.” Couldn’t I have at least started off with the Betty Crocker book someone bought me?
Of course not, because I love a good challenge. Which is also the reason I didn’t choose something simple like roasted chicken. I had to try the Lamb & Feta Cheese Lasagna recipe. Really? Out of all the recipes to choose from I pick one that involves lightly roasted pine nuts, freshly chopped rosemary and oregano leaves and something I’d never heard of before that day, prosciutto.
So let me tell you how my cooking adventure went that day. I got up with all the excitement in the world and pulled out Emeril’s cookbook. I created my grocery list and headed to Gelson’s supermarket.
Tomato paste. Check. 1 1/2 pounds of lamb. Check. 1 pound of lasagna noodles. Check. 1 pound of ricotta cheese and 6 ounces of feta cheese. Check, check. I was feeling good until I realized there were certain things on the list I simply couldn’t find at Gelson’s like the prosciutto.
So I headed to the second store, Vons, and continued my shopping. Why couldn’t I find prosciutto there either? Nowhere in the fresh produce section was prosciutto to be found (okay, stop laughing at me). And why could I not find fresh rosemary or oregano leaves in the seasonings section?
Finally, I purchased all the groceries I could find and headed home to take inventory of what I still didn’t have. 28-ounce can of diced tomatoes in their juices. Check. Oh, wait…why does the recipe also call for a 14-ounce can of diced tomatoes? Didn’t see that one. But why didn’t the recipe just say I needed 42-ounces of diced tomatoes. I was already starting not to like cooking and I hadn’t even fired up the oven yet.
But I wasn’t going to let anything keep me from preparing this special dinner I set out to make for my hubby, so I returned to the store — for the third time — to pick up the remaining items on my list. Up and down the produce isle looking for the prosciutto, I finally broke down and asked the produce man where I could find it. Looking a bit baffled he said, “Ma’am, the proscuitto is in the deli section.” What would it be doing in the deli section, I thought to myself.
Ah ha! Prosciutto is a meat not a vegetable. Okay, one problem solved. Now, about those lightly toasted pine nuts and fresh rosemary and oregano leaves. After realizing the fresh leaves were in the produce section (not the seasoning isle) and the pine nuts would have to be purchased untoasted, I finally had everything I needed to begin cooking.
By now, it’s in the middle of the day and I’ve been shopping for ingredients in this one recipe for several hours. So I begin to prep. First, I needed to determine how to toast the pine nuts since that wasn’t in the recipe. Do I put them in the oven or the skillet? I decided toasting sounded like something I could do easily in a skillet.
Chopped the fresh leaves, cooked the lamb, boiled the noodles and began to pull everything together. Somewhere in the midst of all this, Keith called to see how my day was going and boy did I give him an earful. Not only did it take me three trips to the grocery store but now that I’ve prepped the food, there are literally pots, pans and dirty chopping boards all over the kitchen. What a mess!
Keith could hear the discouragement and frustration in my voice so he gave me a gentle “I love you” and I got back to cooking. After an hour or so of prepping came the moment of triumph. I could finally layer all the ingredients into the 9″ square glass pan and exclaim “Victory!” Then I looked at the dish and thought, “All that for this tiny amount of food?”
Nonetheless, I was finally done and could put the lasagna into the preheated oven (at least I knew how to preheat an oven ![]() ) for 50 minutes. Halfway through the baking, and in the middle of me cleaning two sinks full of dishes, Keith returned home with a beautiful bouquet of white roses. I thought, “God bless that man!”
) for 50 minutes. Halfway through the baking, and in the middle of me cleaning two sinks full of dishes, Keith returned home with a beautiful bouquet of white roses. I thought, “God bless that man!”
The end of the story is the lasagna came out and was one of the tastiest either of us have had and it all seemed worth it. Sort of. Keith swears that experience traumatized me because it took me another 5 years but what I made brought the house down!
It was a slow cooker take on my aunt’s amazing 3-ingredient Roast recipe and to this day it’s a family favorite. Make this at home…I promise you’ll thank me for it.
1 – Beef Roast (I bought a 2.5 lb one on sale for less than $8)
1 – 10oz. can of Campbell’s cream of mushroom soup
1 – packet of Lipton onion dip mix
That’s it. That is the entire recipe. And the best part about it is it is fail-proof! All you do is rinse the beef with cold water and then pat it dry with a paper towel. Put a pan on the stove large enough to fit the roast, turn the pan on high and pop the piece of meat right in the middle. You only want to brown it so flip it over after 30 seconds or so. Do this on both sides of the cut of meat and then turn it on its side and brown each side. This whole process should take 2 minutes max.
Once your roast has been browned, pop it in the crock pot, pour the can of soup over it, evenly sprinkle the onion dip mix over the entire top, cover it with the top and cook it on the lowest setting possible (on my pot it simply says “low”). Begin your day and 8 to 9 hours later – voila! One of the best tasting roasts you’ve ever had. The gravy is so delicious I burned the inside of my mouth not once but four times. I was so excited it turned out so well I kept tasting it directly from the pot (not a good idea, by the way).
And an added benefit to this roast was the extra gravy it made. If you have any leftover (I had about a cup leftover), add some Wondra Quick-Mixing Flour (directions on the can), put it in the freezer and when you’re serving rice, mashed potatoes, chicken or anything that can be spiced up with some delicious gravy, you’ve already got it in the bag (literally, the Ziploc bag).
Give it a whirl and tell me what you think!
Aunt Vivian’s Chicken in White Wine Sauce
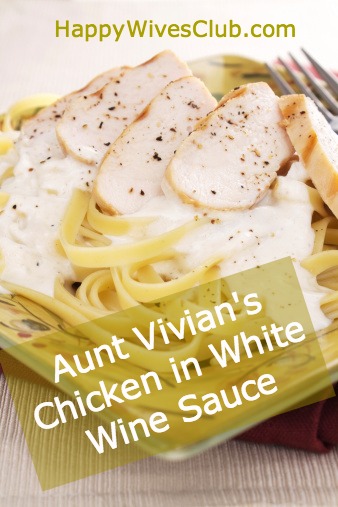
I have never much cared for Italian cuisine. I could leave pasta, the red sauce, and the rich meat sauce alone. Oh but this was until I met an Italian who cooks authentic Italian food. Sharon, our associate pastor and dear friend, introduced me to authentic Italian cuisine about five years ago now. I have tried the best fresh ingredients and flavors. With Sharon’s permission I am sharing this gem of a recipe!
Something I’ve noticed about Italians and the way they cook: It must be made in love! ![]()
From listening to her stories about her family and seeing her love pour out onto us I know that these dishes are more than just making a meal. It is about showing people you love them and wanting to sit down and fellowship with them.
This recipe has been my favorite thus far (and trust me, I have had some amazing dishes).
The Italian name for this dish is: Pollo zia Vivian in salsa di vino bianco which translates to…
Aunt Vivian’s Chicken in White Wine Sauce
- 4-6 Boneless Chicken Breasts
- 1 cup olive oil (approximately)
- 2 cups flour
- 1 stick butter
- 3 cloves garlic
- 1 tsp parsley
- 1/2 lemon
- 5 oz white wine (vino bianco)
- 6 chicken bouillon cubes
With a meat mallet pound the chicken breasts into flour (I put them in a ziploc bag).
Pour approximately 1/2″ of extra virgin olive oil in a large skillet. When the oil is very hot, add the chicken. Cook chicken until it turns white. Remove chicken to a separate plate.
Lower the heat and add the parsley and garlic into the pan. When the garlic turns transparent. Add the butter, wine, and the juice of the lemon letting it simmer on low.
In a mason jar (or container with a lid) add about 10-12 oz hot water & bouillon cubes, taking care to not burn your hand on the hot jar. Shake vigorously, then add 2 Tbs flour & cold water. Shake well. Add this mixture to the skillet. Pour over the chicken. Bake 20-30 minutes at 350 degrees. It should be bubbly and yummy!
This can served over mashed potatoes (that is my vote) or over pasta!
Hope you enjoy!
Aunt Vivian’s Chicken in White Wine Sauce
I have never much cared for Italian cuisine. I could leave pasta, the red sauce, and the rich meat sauce alone. Oh but this was until …
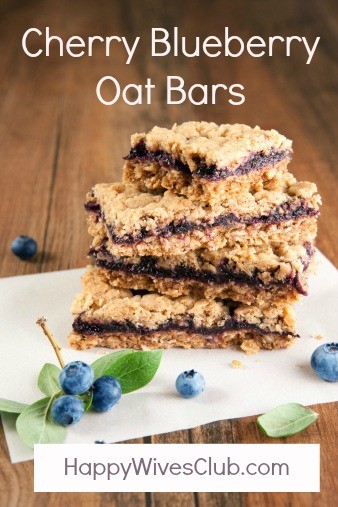
Cherry Blueberry Oat Bars
Last weekend I made it to the farm, barely, to the last day of cherry picking of the season. The large farm was almost picked clean. …
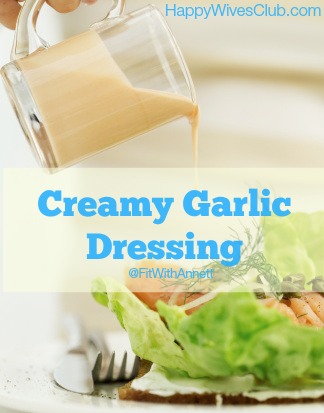
Creamy Garlic Salad Dressing
Most commercial dressings are full of unwanted sugar, salt, artificial colors, flavors, and other things your body doesn’t need. This dressing is void of all of …
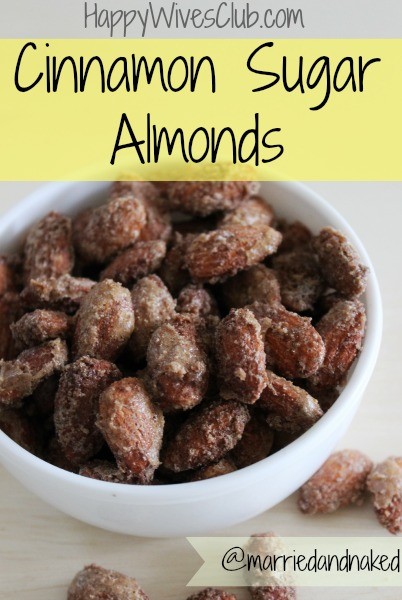
Cinnamon Sugar Almonds
I once heard someone say, “The way to a man’s heart is thru his stomach.” I believe that there is some truth to that statement. Food …

Easy Chicken Stir Fry
My dad went to culinary arts school. So growing up I had a chance to taste all sorts of creations! When I got married and started …

Sour Cream Coffee Cake
In a previous life, I was an innkeeper. My parents, my husband and I ran a family-friendly B&B that routinely hosted 30+ individuals per weekend. We …