No Bake Mini-Cheesecakes (GF)

We love to entertain in the summer, so I’m always looking for easy, healthy recipes that can be made ahead of time. That way, I can enjoy spending more time with my guests and less time in the kitchen.
The warm weather of summer lends itself to a light, refreshing no-bake dessert . So I decided to rework my favorite no-bake cheesecake recipe to create these scrumptious little mini-cheesecakes.
The wonderful thing about this recipe is there’s something for everyone since you can provide a nice little assortment, using a variety of your favorite fresh fruit toppings. Or simply top them with an additional sprinkle of grated lemon zest for an extra punch of tart goodness.
No Bake Grain-Free Mini-Cheesecakes
Ingredients
Nutty Crust
1 cup walnut baking pieces
12 whole pitted organic medjjool dates
2 tsp coconut oil (or butter, softened)
Cheesecake Filling
8 oz. organic plain (or cultured) cream cheese, room temp
1/3 cup pure raw honey
2 tbsp fresh squeezed lemon juice (about 1 lemon)
2 tsp fresh grated lemon zest (about 1 lemon)
1 cup plain organic whole milk Greek yogurt
Fresh Berry Topping
2 1/2 cups of your favorite assorted fresh organic berries
Instructions
Nutty Crust
1. Combine walnut pieces, pitted and halved dates and coconut oil in a food processor and process until very finely chopped. (The mixture will resemble a graham cracker style crust.)
2. Line a 12-cup muffin tin with paper liners. Using your fingers, press the nut mixture into the bottom of each paper muffin liner. (Use about 1 heaping tablespoon per muffin cup.)
Cheesecake Filling
3. Carefully wipe out the food processor container and blade with a clean paper towel (or dish towel). Then add the cream cheese, honey, lemon juice and lemon zest to the clean container and process until well combined.
4. Add the whole milk Greek yogurt and process until smooth and creamy.
5. Divide filling evenly among the 12 muffin cups. Use your finger to even out the top of each muffin cup to ensure the filling is evenly distributed within each cup.
6. Place the muffin tin in the freezer for at least two hours until frozen solid.
Fresh Berry Topping
7. When ready to serve, remove the muffin tin from the freezer. Then remove the mini-cheesecakes one at a time from the muffin tin and gently peel off the paper liners. (Or you can place the frozen solid mini-cheesecakes – liners left on – into an airtight container and just take out what you need and keep the rest frozen for future use.)
8. Place the paperless mini-cheesecakes on a serving platter and allow them to sit on the counter about 20 minutes before serving.
9. While waiting for them to thaw a bit, arrange your favorite fresh berries in a pleasing pattern across the top of each mini-cheesecake.
10. Then serve and enjoy the accolades! These lemony little cheesecakes are AMAZING!


Pico de Gallo {fresh salsa}

Pico de gallo is a fancy word for fresh salsa. Unlike the canned salsas you find in the grocery store, pico de gallo is not cooked and the flavors tend to be more bold.
Not only does it taste better, it’s better for you. Because it isn’t cooked the enzymes and vitamins in the tomatoes, onions, jalapenos, and cilantro are alive and active. These enzymes help you to digest your food better and more efficiently. Most vitamins are destroyed in heat, so eating fresh or raw vegetables ensure that you are getting the most bang for your buck at the grocery store or from your garden harvest.
Add more or less jalapeno to suit your preference. If you prefer a mild pico, use less. Don’t omit it all together as that is what gives it it’s distinct flavor. If you are like me and prefer a spicier pico, use two jalapenos.
Pico de gallo is a great topping for enchiladas, tostadas, tacos, quesadillas, grilled chicken breast, steak, and baked potatoes. You can also add cooked shrimp for a spicy cocktail for chips or crackers. Triple the recipe and take it along with a bag of chips to any party for a hit. The possibilities are endless.

Ingredients:
1 1/2 cups fresh diced tomatoes
1/3 cup finely chopped onion
1-2 finely chopped jalapenos, de-seeded*
1 tablespoon finely chopped fresh cilantro
3/4 teaspoon salt
1/2 juice of 1 lime

Instructions:
1. In a medium bowl combine the tomatoes, onion, jalapenos, and cilantro.
2. Sprinkle salt and lime juice over the vegetables. With a spoon gently toss until everything is well combined.
3. Place in the refrigerator for 1+ hours for the flavors to meld, serve chilled.
*When chopping and de-seeding jalapenos it is best to either wear gloves or wash your hands immediately once you are finished. Do NOT put your hands near your eyes or that of your children as the jalapeno juice can linger on your hands for hours and cause burns.
Healthy Cantaloupe Bread

It’s definitely the season for fresh cantaloupe…at my local store recently it was on sale 10 for $10! I bought quite a few and then thought…Ummm what will I do with all of these cantaloupes! So I began looking up some deelish recipes in my cookbooks and online. I found a wonderful recipe for Cantaloupe Bread, however, it was too fattening for my taste…so I created my own! Enjoy!
Ingredients:
- 3 egg whites
- 1/8 cup coconut or olive oil
- 1/2 cup sugar
- 1 Tbsp vanilla extract
- 2 cups cantaloupe – peeled, seeded and pureed
- 3 cups flour (I used white..but you could use wheat..will make a denser texture)
- 1 tsp salt
- 1 tsp baking soda
- 3/4 tsp baking powder
- 2 tsp cinnamon
- 1/2 tsp ground ginger
Directions:
Preheat oven to 325 and lightly spray a 9×5 loaf pan or small baking dish…such as a 10×8 or a little larger. In a large bowl, beat together eggs, oil, sugar, vanilla and cantaloupe. 
In a separate bowl, sift together flour, salt, baking soda, baking powder, cinnamon and ginger…I use a sifter…do you?

Then blend all together and pour into loaf pans or small baking dish

Bake in oven for 1 hour for loaf pans OR 30 minutes for small baking dish until a toothpick inserted into center comes out clean.
YUM!! This is delish and tastes a lot like Zucchini Bread BUT has a slight cantaloupe flavor.
Just a little tip…did you know that when you puree these kinds of fruits that you need very little oils to cook with? As a matter of fact, oils can almost completely be eliminated by using pureed fruits such as applesauce, pureed pumpkin and the like.
Want to try more cantaloupe recipes? Here is another one that is out of this world…Cantaloupe Ice Cream!
Bacon-Cheese Pull-Aparts

I found this recipe a long time ago via Pinterest and I made it for dinner one night. After deciding that it was very good, but definitely more of a breakfast food, I decided to make it again recently for my Sunday School class!
We are in the young married couples class and we all like to take turns bringing breakfast each Sunday. I decided this would be the perfect recipe to make and bring in and it was a huge hit! There was nothing left at the end. The recipe was simple and easy to make which I loved because Sunday mornings can be pretty hectic in our house.
I hope you get the chance to try it for breakfast one morning, I know you will love it!
Ingredients:
- 1 egg
- 2 tablespoons of milk
- 1 can of Pillsbury Grands Flaky Biscuits (Original)
- 1 package of pre-cooked bacon
- 3/4 cup of shredded cheddar cheese (I used Colby cheese)
- 1/4 cup of chopped scallions
How to Make:
1. Preheat oven to 350 degrees and spray your casserole dish with cooking spray. 2. Cut the entire package of bacon into 1 inch pieces and set aside. Chop up scallions and set aside. 3. In a large bowl, mix the egg and milk together with a whisk until smooth. 4. Open up the biscuits and separate. Cut each biscuit into quarters (4 pieces each). 5. Gently stir the dough into the milk and egg mixture and make sure they are all coated evenly. Add bacon cheese and scallions. 6. Spoon the mixture into your casserole dish and arrange biscuits in a single layer. 7. Bake for 23-28 minutes or until golden brown. (I would watch carefully, mine cooked pretty fast).

Image From: www.pillsbury.com
Recipe From: www.pillsbury.com
Let us know how you like these Bacon-Cheese Pull-Aparts!
Chicken Tacos

These chicken tacos fall into the healthy, quick and easy category which makes them an ideal weeknight dinner. My husband and I love them for many reasons. Using tender shredded chicken thighs instead of ground beef as the base is not only more nutritious, but we think they make for a more interesting, chunkier taco.
We pile on fresh cold veggies, with varying textures and levels of crunch, so they’re light and refreshing for hot summer nights. I like to make the chicken in advance and store the shredded thighs in the fridge so that all I have to do at dinnertime is warm the tortillas and chop the vegetables.
Tacos are also highly customizable (everyone makes their own!) so they are a good choice for guests or picky little eaters.
I’ve listed some ideas for toppings, but really, anything goes! In the past I’ve thrown on some leftover cooked kale, squeezed a little lemon juice on top, and added a few torn basil leaves. Just don’t skimp on the vegetables, they truly are the best part.
Chicken Tacos
For the chicken:
1 package chicken thighs
1 onion
1 bay leaf
3-5 cloves garlic, slightly crushed with the flat part of your knife
1 tablespoon cumin
Salt and freshly ground pepper
Rinse the chicken and put it in a medium-sized pot, along with the rest of the ingredients. Add enough water to cover all of the chicken. You can add more or less of each of these ingredients, or simply simmer the chicken in salted water–the aromatics and spices lend a subtle flavor to the chicken. Bring to a low boil, cover partially, and cook for about 30 minutes or until the chicken is tender and falling apart. Let cool and then shred with your fingers or a fork, discarding any excess fat.
For the tacos, heat up several tortillas (corn, flour, spinach–whatever you like!) wrapped in tin foil in a 350-degree oven.
You can use any kind of taco toppings you like, but here are some of our favorites:
Sour cream
Salsa
Cheese (feta, shredded cheddar or Monterey jack)
Sliced green, red, yellow, or orange bell peppers
Pickled jalapeno and banana peppers
Shredded red cabbage
Diced tomatoes
Mashed avocado
Diced cucumbers
Fresh spinach or arugula

Spicy Tropical Fruit Skewers {Grilled}

I must confess, grilled fresh, sweet, ripe fruit is truly one of my favorite summertime desserts! The naturally occurring sugars are enhanced via the grilling process – transforming the fruit into an irresistible treat that pairs beautifully with the creamy, cold addition of some homemade ice cream.
Now, here’s the kicker – literally! I’ve added a dash of cayenne pepper to the grilling glaze to give these tropical fruit skewers a hint of heat that leaves you begging for more – or maybe it’s just me?
P.S. For an incredibly luscious breakfast treat, double the recipe and refrigerate the leftover grilled fruit. Then layer the chilled fruit in individual serving dishes with Greek yogurt and homemade granola for an unforgettable Tropical Fruit Parfait! Yum!
Spicy Tropical Fruit Skewers
Ingredients
Spicy Fruit Glaze:
1/4 cup pure maple syrup
1 tsp olive oil
1/4 tsp ground cinnamon
1/8 tsp cayenne pepper (or more for extra kick)
Fruit Skewers:
1-2 cups of fresh pineapple chunks
1 fresh organic mango, peeled and cut into chunks
1-2 kiwis, peeled and thick-sliced
1 large banana, peeled and thick-sliced
Instructions
- Preheat grill to medium-high heat making sure grill is thoroughly preheated before you begin grilling.
- In a small bowl, whisk together the Spicy Fruit Glaze ingredients; set aside. (If using bamboo skewers, be sure to soak them in warm water while you’re preparing the rest of the ingredients.)
- Cut fruit into cubes/slices that can be easily thread onto a skewer. Be sure to keep them all about 2×2-inches in size, so they’ll cook evenly. (Speaking of which, feel free to add additional tropical fruits as well – papaya and starfruit are also delicious options!)
- Brush sweet-n-spicy glaze evenly among fruit skewers, making sure to generously brush both sides.
- Cook fruit uncovered over medium heat just long enough to form grill marks (about 1-2 minutes). Then, carefully turn the fruit skewers over and brush with remaining glaze, if desired. Cook for about another 1-2 minutes, until lightly browned and caramelized.
- Serve with a scoop of your favorite homemade vanilla ice cream. Sprinkle top with some toasted unsweetened shredded coconut, if desired.
- Please note: Since grill temperatures can vary dramatically, be sure to keep a close eye on your fruit skewers. The goal here is to simply sear the exterior of the fruit to produce a rich caramelized flavor, not to cook the fruit through. Enjoy!

Chicken with Asparagus and Penne

You want a quick meal? How about 20 minutes using just 5 ingredients? If so, this recipe is for you! This is one of our favorite go to meals because it is quick and easy. Cooking everything simultaneously cuts down on time since only three items need to be cooked, this is a breeze! Mix it up by using something other than asparagus. I have tried this with various veggies, and enjoyed it with broccoli, as well as cauliflower, but my husband prefers asparagus. So here we are. Also, you can omit the cheese if you’d like, which would negate the need to broil this. Since everything is cooked beforehand, you can serve it up right away!
Chicken with Asparagus and Penne
Ingredients:
- 1 pound of Asparagus
- 12 ounces of Penne Pasta
- 1 pound of Chicken breast, cubed
- ½ cup of Parmesan Cheese, shredded
- ¼ cup Olive Oil
Instructions:
- Bring a medium pot of water to boil. Add penne pasta.
- While water is boiling, heat up a medium sized skillet with cooking spray and begin cooking cubed chicken.
- Steam asparagus. You can do this a variety of ways, so use your favorite. Personally, I place a colander over my pot of boiling water and place the asparagus inside and cover it. Yes, it takes a little bit of skill to stir the pasta, but they cook at almost the exact same amount of time. You can use the microwave if you are more comfortable, it will cook quicker so that is an advantage.
- Place steamed asparagus on the bottom of a 9×13 baking dish.
- Drain pasta and pour on top of asparagus. Add chicken over pasta.
- Drizzle olive oil over top and stir a little to evenly coat pasta and chicken.
- Add the Parmesan cheese on top of everything.
- Broil for 5 minutes or until cheese browns a little bit.
Enjoy!
Nicole Glass for Glass on the Outside
Sizzling Summer Fajitas

Summertime is the perfect time to get your grill on and enjoy some easy and delicious meals like these super Sizzling Summer Fajitas!
You can prepare the fajita kebobs up to 2-3 days in advance. Then, just brush on the marinade at least one hour (or up to 12 hours) before grilling. These pair beautifully with Mexican-style rice and warm homemade tortillas. Yum!
And whether you’re a novice, or veteran griller, be sure to check out my Top 10 Best Grilling Tips for some secrets of success that are certain to take your grilled foods to a whole new level of excellence!
Sizzling Summer Fajitas
Yield: 4-5 servings
Fajita Ingredients:
1.25 pounds of beef sirloin steak, cubed
or boneless, skinless chicken breasts, cubed
(or use a combo)
1 large red onion, cut into wedges
1 large red bell pepper, cut into 2-inch pieces
1 large yellow bell pepper, cut into 2-inch pieces
Fajita Marinade:
1/4 cup olive oil
1/4 cup of fresh-squeezed lime juice (approx. 2 limes)
2 cloves garlic, finely minced
1 tsp sea salt
1/2 tsp freshly ground black pepper
1 tsp homemade Emeril Essence Seasoning (or favorite fajita seasoning)
Instructions:
1. In a small bowl, whisk together the Fajita Marinade ingredients. (The marinade can be made ahead of time and refrigerated for up three days.)
2. Cut kebob ingredients into cubes/pieces that can be easily thread onto a skewer. Be sure to keep the beef and/or chicken chunks to no more than 2×2-inches in size, so they’ll cook evenly along with the veggies. (Speaking of which, feel free to add additional veggies – organic zucchini, yellow squash and mushrooms are all great options!)
3. Next, brush the kebobs generously with the marinade. Then, cover marinated kebobs and refrigerate for at least one hour to allow flavors to meld. (Please note, you can make the kebobs in advance and keep them refrigerated for up to three days.)
4. When ready to eat, preheat grill to medium heat making sure it’s thoroughly preheated before you begin grilling. Cook kebobs over medium heat about 3-5 minutes. Then, carefully turn the kebobs over and continue cooking for another 3-5 minutes, or until they reach the desired level of doneness.
5. Please note: Since grill temperatures can vary dramatically, be sure to keep a close eye on your kebobs. If the meat or veggies start to get too dark before they’re cooked through, turn down the heat and move the kebobs to a cooler part of the grill to finish cooking. Or turn off the grill and cover the kebobs, until the meat is cooked to desired level of doneness.

Happy summer grilling!
Spring Lamb with White Beans

This dish, to me, is an ideal marriage of rustic and elegant. Rustic, because of the earthiness of the lamb and the rosemary, and the savory richness of the juices that infuse the beans. Elegant because of the perfect balance in flavors, the softness and delicacy of the tiny white cannellinis. I can imagine this roast in the homes of ancient Greek peasants, just as I can imagine it at the banquets and feasts of their rulers. Deliciously simple, yet somehow exquisite.
I always think of lamb as a spring dish–perfect for Easter (which I’m just a tad late for), or Mother’s Day, or a special graduation dinner. And this preparation in particular is wonderful for this time of year. The white beans bring a lightness and freshness to the roast, a burst of white against the red meat, and in fact, sometimes I’m convinced they even steal the show. As they cook in the juices of the lamb, the beans develop the most lovely taste and the creamiest texture. Lamb can be a little rich (though I recently learned that it’s actually quite healthy) and the beans provide a refreshing balance.
I would typically serve this with a bright green side, like spring asparagus or a colorful green salad.
Roast:
1 leg of lamb, 6-8 pounds
Juice of 1 lemon
2 Tbs. fresh rosemary
1/2 Tbs. salt
1/2 tsp. black pepper
4 cloves garlic, peeled and cut into slivers
Seasoned Beans:
5 cans cannellini beans, rinsed and drained
2 cloves garlic, diced
1 small onion, chopped
1 Tbs. fresh rosemary
1/2 Tbs. salt
1/2 tsp. black pepper
Trim some of the excess fat from the leg of lamb and let the meat sit at room temperature for a half hour. Then sprinkle all over with lemon juice and rub it with salt, pepper, and rosemary. Cut small gashes into the roast with a sharp pointed knife and insert numerous slivers of garlic. Place roast in a large pan or dutch oven and cook at 350 degrees.
In a large bowl, mix the beans with the garlic, onion, rosemary, salt, and pepper. At about the 90-minute mark of the roasting, pour the seasoned beans right into the pan all around the roast. Stir in with the lamb juices and return to oven for an additional half-hour of cooking.
The dish will be done after a total of about two hours of roasting. The internal temperature will register 135 degrees for rare meat, 145 for medium-rare, and 160 for medium-well (be careful not to overcook the lamb). Serves 8-10.
Recipe is from my family’s cookbook Finger Lakes Feast. Originally adapted from A Continual Feast cookbook.
Easy Breakfast Tostadas

Tostadas make a super delicious and healthy way to start the day! And they’re especially quick-n-easy to assemble when you use leftovers from your favorite home-cooked Mexican-themed dinner.
That’s why whenever I schedule tacos or burritos on my Weekly Meal Plan, I also make sure there are some leftovers for making these fast and fun breakfast tostadas. Then, it’s as simple as toasting the tortillas, scrambling up some eggs, and pulling out a few leftovers to create an awesome build-your-own Breakfast Tostada Buffet.
Easy Breakfast Tostadas
Ingredients:
1 whole grain flour, corn or GF tortilla per person (homemade tortillas are the best!)
2 eggs per person you’re serving
Leftover taco meat, refried beans or fajita ingredients
Sour cream
Pico de gallo (or salsa)
Diced avocado (or guacamole)
Shredded cheese
Finely chopped fresh cilantro
Directions:
1. Place tortillas in 250-degree oven to allow them to slowly crisp-up (about 5-8 minutes).
2. Heat a large skillet over medium heat. In a large bowl, whisk eggs with just a bit of water or milk, until foamy.
3. Add some butter or olive oil to the hot pan and then carefully pour in the eggs. Using a whisk (or wooden spoon), gently stir eggs until curds form. Switch to a spatula to turn over eggs until cooked, but not dry. Transfer to a large bowl and cover.
4. Place the scrambled eggs, tortillas and all of the remaining ingredients out on the counter to form a build-your-own Breakfast Tostada Buffet.
5. Then, hand everyone a plate and take turns creating your own delicious tostada – definitely a fun and healthy way to start the day!

Creamy Shrimp and Artichoke Casserole

This is another recipe courtesy of my wonderful mother-in-law, Shari, and the amazing cookbook she gave me prior to marrying her son almost five years ago. At my bridal shower, she presented me with a gift that is worth its weight in gold-a cookbook filled with my husband’s favorite recipes! This one is a particular favorite and even though I personally hate seafood, I make this because I love how excited my husband looks when he walks in the house and can smell the dish!
It is so easy and quick (way under 30 minutes!) that I tend to prepare this dish for him if I’m going out of town for the weekend and want to make sure he’ll eat something other than milk and cookies!
Creamy Shrimp and Artichoke Casserole
What You’ll Need:
- 5 ounces fresh mushrooms
- ¼ cup margarine or butter (plus a tablespoon to sauté mushrooms)
- 3 tablespoons flour
- ½ teaspoon salt
- ¾ cup half & half
- 12 ounces of shrimp meat (approximately)
- 2 jars (6 ounces each) marinated artichoke hearts
- ¼ cup white wine
- ¼ cup grated Parmesan cheese
First, let me start by saying that this dish cooks extremely fast! By fast I mean that if this dish takes longer than 15 minutes, you are doing something the hard way!! My advice is to measure out all of your ingredients and line them up in the order needed. I wish I was kidding, but I am not. The first time I made this dish I almost ruined it because I was trying to measure out ingredients after things had already started cooking.
How to Make It:
- Sauté mushrooms in butter: melt butter (tablespoon) in a small pan and add mushrooms. Cook until golden.
- While sautéing mushrooms, melt butter (¼ cup) into a large pan on medium heat.
- Stir in flour and salt and cook until smooth and reduce heat to low. (You may need to add a tiny bit more butter)
- Stir in half & half slowly and bring mixture to a boil. Stir constantly.
- Stir in shrimp and artichoke hearts. Cook about 5 minutes or until shrimp is cooked thoroughly at medium high heat.
- Stir in cooked mushrooms and wine, heat until hot.
- Sprinkle with Parmesan cheese and serve.
You can serve this dish over rice, as my mother-in-law suggests in my cookbook, but my husband will eat it out of the pan with a slotted spoon if I let him! Really though, you can serve this with a nice salad or grilled veggies, but you might want to start those before you start this dish as it cooks fast!
Enjoy!
Nicole @ Glass on the Outside
The Easiest Lasagna Ever!

Hey all of you Happy Wives out there! I have a deeelish and EASY Lasagna recipe that will put a smile on your face for sure! It’s so easy that you can make several and freeze or give to friends. You can make this on a busy night easy! Whether you are just learning to cook or feeding a crew..EASY. Oh did I already say that?! Ok so on with the recipe ![]()
Easy Peasy Lasagna
Ingredients:
- 12 oz. Cottage Cheese (any kind or you can use ricotta)
- 3-4 Cups Mozzarella Cheese
- 2 Eggs
- 1/3 Cup Parsley
- 1 tsp. Powder Onion
- 1/2 tsp. Basil
- 1/8 tsp. Pepper
- 1 can/jar Spaghetti Sauce (you fave) 2 cans if you like really saucy Lasagna
- 1 lb ground beef (or turkey)
- 9 Lasagna Noodles (you don’t even cook these first..Yay!)
Directions:
- Brown Ground Beef/Turkey and then add Spaghetti Sauce
- Mix together in a bowl…Cottage Cheese, 2 cups Mozzarella, Eggs, Parsley, Onion Powder, Basil and Pepper
- Spray a 9X13 pan with cooking oil..gotta have easy clean up
- Now start layering…meat sauce, noodles, cheese mixture, meat sauce, noodles, cheese mixture etc.
- Top with the rest of the Mozzarella Cheese
- Now pour around the edges of the Lasagna, 3/4 cup of water.
- Cover with foil and cook at 375 degrees for about 45 minutes.
- Uncover and cook for an additional 5-10 minutes.
Of course you can make your own Spaghetti Sauce if you want ![]()
You can also make some Homemade French Bread because that’s easy too!
Enjoy!
Aunt Vivian’s Chicken in White Wine Sauce
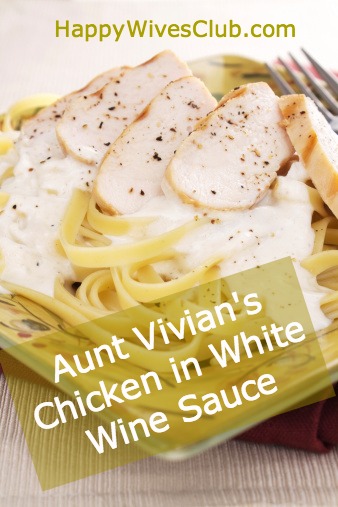
I have never much cared for Italian cuisine. I could leave pasta, the red sauce, and the rich meat sauce alone. Oh but this was until I met an Italian who cooks authentic Italian food. Sharon, our associate pastor and dear friend, introduced me to authentic Italian cuisine about five years ago now. I have tried the best fresh ingredients and flavors. With Sharon’s permission I am sharing this gem of a recipe!
Something I’ve noticed about Italians and the way they cook: It must be made in love! ![]()
From listening to her stories about her family and seeing her love pour out onto us I know that these dishes are more than just making a meal. It is about showing people you love them and wanting to sit down and fellowship with them.
This recipe has been my favorite thus far (and trust me, I have had some amazing dishes).
The Italian name for this dish is: Pollo zia Vivian in salsa di vino bianco which translates to…
Aunt Vivian’s Chicken in White Wine Sauce
- 4-6 Boneless Chicken Breasts
- 1 cup olive oil (approximately)
- 2 cups flour
- 1 stick butter
- 3 cloves garlic
- 1 tsp parsley
- 1/2 lemon
- 5 oz white wine (vino bianco)
- 6 chicken bouillon cubes
With a meat mallet pound the chicken breasts into flour (I put them in a ziploc bag).
Pour approximately 1/2″ of extra virgin olive oil in a large skillet. When the oil is very hot, add the chicken. Cook chicken until it turns white. Remove chicken to a separate plate.
Lower the heat and add the parsley and garlic into the pan. When the garlic turns transparent. Add the butter, wine, and the juice of the lemon letting it simmer on low.
In a mason jar (or container with a lid) add about 10-12 oz hot water & bouillon cubes, taking care to not burn your hand on the hot jar. Shake vigorously, then add 2 Tbs flour & cold water. Shake well. Add this mixture to the skillet. Pour over the chicken. Bake 20-30 minutes at 350 degrees. It should be bubbly and yummy!
This can served over mashed potatoes (that is my vote) or over pasta!
Hope you enjoy!
Aunt Vivian’s Chicken in White Wine Sauce
I have never much cared for Italian cuisine. I could leave pasta, the red sauce, and the rich meat sauce alone. Oh but this was until …
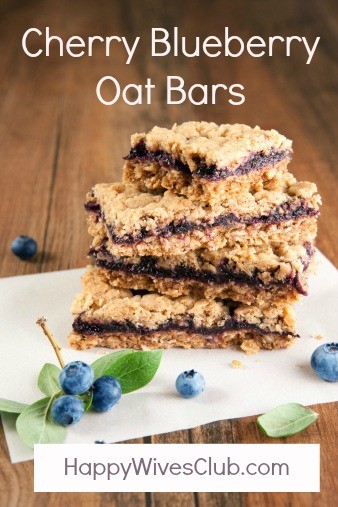
Cherry Blueberry Oat Bars
Last weekend I made it to the farm, barely, to the last day of cherry picking of the season. The large farm was almost picked clean. …
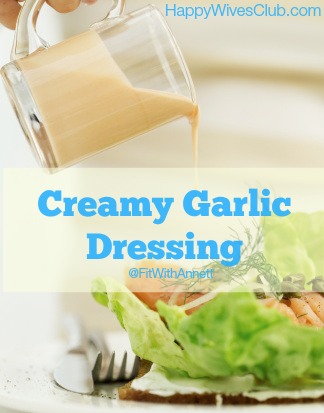
Creamy Garlic Salad Dressing
Most commercial dressings are full of unwanted sugar, salt, artificial colors, flavors, and other things your body doesn’t need. This dressing is void of all of …
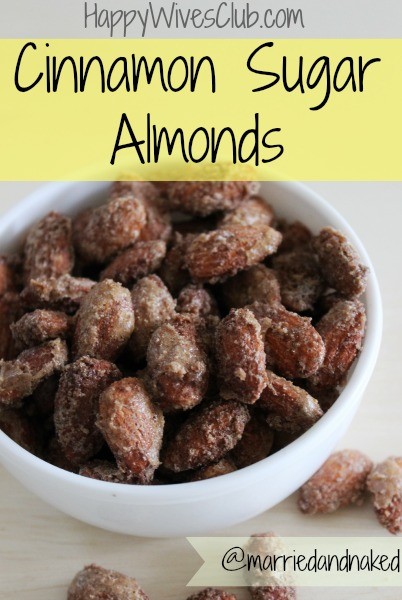
Cinnamon Sugar Almonds
I once heard someone say, “The way to a man’s heart is thru his stomach.” I believe that there is some truth to that statement. Food …
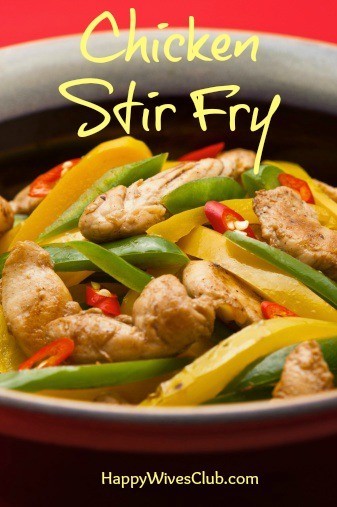
Easy Chicken Stir Fry
My dad went to culinary arts school. So growing up I had a chance to taste all sorts of creations! When I got married and started …

Sour Cream Coffee Cake
In a previous life, I was an innkeeper. My parents, my husband and I ran a family-friendly B&B that routinely hosted 30+ individuals per weekend. We …