Tag Archives: healthy recipes

creamy garlic dressing

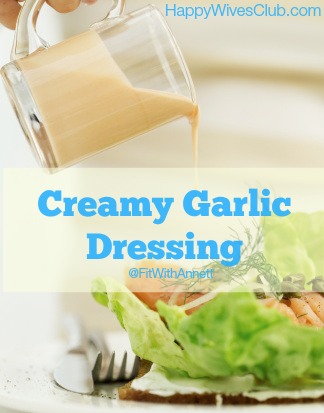
Creamy Garlic Salad Dressing

Most commercial dressings are full of unwanted sugar, salt, artificial colors, flavors, and other things your body doesn’t need.

This dressing is void of all of the yuck, and brings on the yum.

If you are looking to clean up your eating, and go as close to nature as possible, this simple recipe is for you.

Creamy Garlic Dressing

Ingredients

  • 1/2 cup extra virgin olive oil
  • 1/4 cup apple cider vinegar
  • 3-4 cloves of garlic
  • 3 TBS fresh lemon juice
  • 1 tsp sea salt
  • 1/2 tsp Dijon mustard
  • 1 TBS raw honey (or pure maple syrup)
  • 1/2 bunch parsley

Directions

Place all of the ingredients in a blender.  Blend until smooth. If you need more parsley or garlic, add more to taste and blend again until smooth. Refrigerate dressing if not using immediately. It’s alright if the dressing solidifies when cold, it’s natural. Just take it out of the refrigerator and keep at room temperature for 30 minutes. Stir before serving. Enjoy!


Why Your Health Food is Making You Fat

Why Your Health Food is Making You Fat

I have a love/hate relationship with food labels.  On one hand they can offer great information about the nutrition within. But, on another hand they can be tricky and misleading.

Today manufacturers know what’s ‘hot’ and you better believe that they are going to write whatever they can on their label to make you want to purchase their product.

Gluten free, low-fat, no sugar, fat-free, low carb, all-natural, all of these names are written on food products to lure us into buying their item over another.  On the surface everything sounds great but beware it isn’t.

Could your ‘health’ food be making you fat?

Well it’s a strong possibility.

Gluten Free

Just because something is labeled ‘gluten free’ doesn’t mean that it’s healthy. You can have a sugar filled cake that’s gluten free. In fact, there’s a gluten free cookie that when you eat just two you would have consumed as much saturated fat as 10 chicken McNuggets! And, those same two cookies contain a whopping 220 calories and 16 grams of sugar.

There’s also a gluten free bagel on the market that contains 440 calories for 1 bagel, and you get to enjoy a whole 16g of fat with it as well. That’s more fat than 3 scoops of some ice creams. Lucky you! So beware. Just because it’s gluten free doesn’t mean it’s healthy for you.

Diet Soda

One of the first things that soda drinkers think they should do when they go on a diet is to switch from regular soda to diet soda. On the surface it seems like a smart idea because most diet sodas have low to no calories, and they are made without sugar. Again, don’t let the manufacturer fool you!

What dieters don’t know is that for some people diet soda can actually make you more hungry! They get the opposite effect of what they want.  Now this doesn’t happen for everyone, but why take your chances. Even though some people may lose weight while drinking diet soda, it’s most likely because the dieter is changing other food habits which makes a huge difference. Who wants a bunch of chemicals in them anyway.  It’s not worth it.

Organic Snacks

If you stroll down your local grocery aisle you’ll find tons of organic snack options. Are they any better than normal processed foods? Well think about it. Sure they have organic ingredients in them, and that’s great, but they are still processed foods. Lots of organic snacks still have a ton of sugar and salt, which is still bad for you.

What’s a girl to do? Stick with whole ‘real’ foods that don’t come in a box.  One of the best words of advice I ever heard was that if it doesn’t come from the earth or if you can’t pronounce what’s in it, don’t eat it! Another tip is to try to stick to things with 5 ingredients or less, or straight from the ground, and better yet not in a box.

Granola

I love it when my friends show me their ‘healthy’ snacks.  Because I’m a virtual fitness coach they want to hear my opinion of their food.

Granola is one of those things that a lot of dieters gravitate to when they start dieting because it’s one of those foods that they’ve always thought of as being healthy.

It’s not that granola is bad for you, it can be a great treat if you are hiking or doing a tough workout.  But, what isn’t healthy are most of the granola bars that you see lining the supermarket shelves. These are usually loaded with excess sugar, fat, and oil – a dangerous combination. Again, the best solution is to make your own (you can swap out agave for honey and use 1/4-1/2 cup only)!

Comment:  What foods did you think were “healthy” that you are going to now swap out?

chicken stir fry

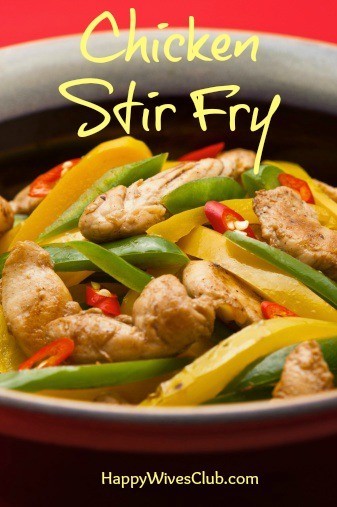
Easy Chicken Stir Fry

My dad went to culinary arts school. So growing up I had a chance to taste all sorts of creations! 

When I got married and started cooking for my husband (at the time I could NOT cook) and we had some adventures. I tried simple recipes. After awhile I started making and mixing my own stuff. This has been a slow process simply because I am a busy woman! I have things to do besides slave over a complicated recipe… oh did I mention I am not that patient? :)

So a couple weeks ago I made a dish.. from scratch! It was SO easy! I had to share with all you other busy women out there! (Also this was my VERY FIRST time cooking with ginger! I loved it)

Easy Chicken Stir Fry

Ingredients:

  • 2 boneless chicken breast
  • 1 bag of minute rice / instant / boil in a bag
  • 2 green peppers or red peppers
  • 1 large onion, diced
  • Vegetable or Olive oil
  • Salt
  • ginger powder
  • garlic powder
  • soy sauce

Chicken

Preheat oven to 425. Cut chicken breast into strips. Season chicken with salt, ginger powder, and garlic powder. Sprinkle evenly across the chicken. I did not measure this. Just eyeballed it :) Cook the chicken until done. Then cut into bite sized chunks. 

Vegetables

Cut the peppers and onion into strips. Then heat up a skillet or frying pan to medium heat with a little oil. I didn’t measure the oil, but my guess is that it was about 3-4 tablespoons. Add 1-2 tablespoons of ginger and 1 tablespoon garlic powder. Saute with the onions and peppers (when the onions are clear they are done). 

OK, now I had some instant rice because that is the extent of my talent with rice :) I followed directions on box. 

Add the chicken to the veggie pan. Add 2 tablespoons of soy sauce. Thoroughly mix into the rice. 

Viola! You have a healthy, yummy dinner!! 

Disclaimer: I made this portion for just the two of us, so you may want to add more if your cook for a larger family. Also add or take away spices for your families taste buds. Feel free to add more veggies if you want (carrots, snow peas, red onions, water chestnuts, or broccoli). I used what I had on hand. If you have fresh garlic and ginger, use it. It will make it even better!!!

Love,

Aunt LaLa

Smoothie

Tropical Green Smoothie

Today in Southern California, where I live, the temperature is 92 degrees!  I’m a little north of Los Angeles, and we are having a mini heatwave. 

On days like this I try not to turn on the stove or oven.  I like to eat cool salads dressed with homemade citrus dressing.  Or, I like to enjoy cool and sweet fruit and green smoothies.

Most of my friends are used to the smoothies from popular juice chains that are filled with nothing but fruit and yogurt. But, if you have a a blender you can throw in some greens and make an even healthier treat (without the dairy).

I joined a 30 day green smoothie challenge a couple weeks ago.  To be honest, I was a little scared of how these green smoothies would turn out because I really didn’t want to chew my juice.  Having a juicer that extracts all of the excess fiber means that my juice comes out smooth just like it would if you were buying it in a bottle from the store. To my surprise, the first juice I blended in my Blendtec blender was great!

Being the type of gal who loves to share what she learns, here’s one of my favorite recipes from the challenge with my own tangy twist.

Tropical Green Smoothie

Ingredients:

  • 2 cups cold water
  • 2 cups spinach
  • 1 cup ripe fresh pineapple
  • 1 orange (peeled)
  • 1 ripe banana
  • 1/4 cup unsweetened coconut flakes
  • 1/4 lime (peeled)

Directions:

Pour water, coconut flakes, and spinach into blender.  Blend until smooth (no chunks).  Next add pineapple, orange, banana, and lime.  Blend until smooth.  If you wish you can add 1 cup of ice and blend to a smoothie texture, or serve over ice.

Enjoy!

Comment:  What’s your favorite Green Smoothie Recipe?


risotto

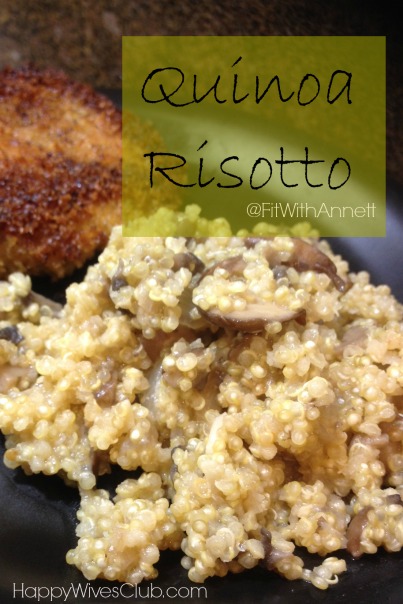
Quinoa Risotto

A few years ago, I played in a volleyball tournament in South Carolina.

It was hot, muggy, and gorgeous.  We made a good showing at the event making it to the semi-finals I believe. I’m not good at remembering my finishes.

What stood out to me more than anything, and is something that I have never forgotten was my first taste of quinoa.

At this particular event the staff of the AVP (the professional volleyball tour that I played for) had hired a fantastic chef to prepare our food. Everything was delicious, and highly nutritious.

It wasn’t until last year though that I actually tried to make quinoa and it has become one of my favorite side (or main) dishes.

If you’ve never tried it, I highly recommend that you do. It can be substituted for rice, and what I love is that it packs a lot of protein.

Quinoa Risotto

Ingredients

  • 4 Tbsp olive oil
  • 8 oz baby bella mushrooms
  • 1 cup quinoa, rinsed
  • 3 cups chicken broth (or veggie broth)
  • 1/3 cup white wine
  • 1 shallot diced
  • 2 cloves garlic, minced
  • 1/4 cup parmesan cheese, grated
  • salt and pepper to taste

Directions

In a large skillet heat the olive oil over medium heat.  Add the mushrooms and saute until soft (about 5 minutes).  Remove from skillet and set aside.  Add garlic and shalot to pan and saute until they being to soften and turn translucent, about 5 minutes. 

Add quinoa. Stir for approximately 3 minutes.  Lower the heat to simmer, and add the wine cooking until it is absorbed.  Next add 1 1/2 cups broth.  Stir until it is absorbed completely.  After that add the remainder of the broth.  Stir occasionally until broth is absorbed and qunioa germs burst open.  It should taste al dente when done.

Stir in the parmesan cheese and mushrooms, and turn off heat. Cover with a lid and let stand 5 minutes.

What’s your favorite risotto?


easy pancakes

Easy Banana Pancakes – Just 2 ingredients

Who says that pancakes can’t be part of a healthy diet?

Who says that making pancakes from scratch is hard?

Who says that once you go gluten free that you can’t have pancakes ever again?

With this easy 2 ingredient recipe, yes you can!

This recipe is gluten free, AND dairy free so if you are sensitive to either you can enjoy these too.

Ingredients

2 1/2 ripe bananas

4 eggs

(optional cinnamon, pumpkin pie spice, pure vanilla extract)

Directions

Put 4 eggs into blender.  Add bananas. Pulse until blended.  (You can also just put it all in a bowl and smash/stir together).  If you wish you can add other seasonings listed above. 

Heat griddle until hot. Use cooking spray, coconut oil or grass fed butter to oil pan if you aren’t using a non-stick griddle. Pour pancake batter onto pan. Cook about 1 1/2 – 2 minutes until pancake when lifted slightly is medium brown underneath. Once it’s medium brown in color flip to the other side. Cook until done.

You can serve with blueberries, strawberries, bananas, and top with pure maple syrup.  Or, you can eat it with no toppings at all. It’s yummy as is.

Enjoy!


oatmeal brulee

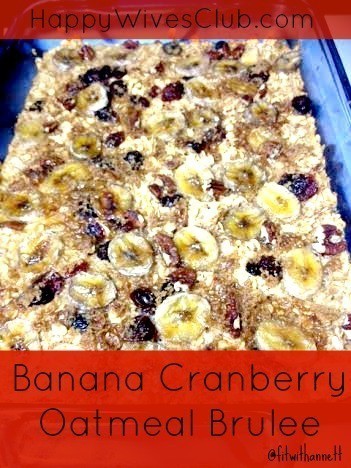
Banana Cranberry Oatmeal Brulee

In the winter time I love to eat comfort food.  Not only do we eat hot delicious creamy meals for dinner, I also like to eat warm food for breakfast.

Being a fitness advocate, I advise my clients to eat healthy whole grains and whole foods, like whole oats which are going to not only fill them up, but more importantly nourish their body.

Oatmeal is known to be a heart healthy meal.  Not only is it yummy, but it lowers the LDL (bad) cholesterol level. 

Not only does it help with lower cholesterol, but it also helps with high blood pressure, type 2 diabetes, and helps to keep your weight low.

Being high in fiber, low in fat, and high in protein food, another benefit of oatmeal is that it makes you feel full longer.  This is a great benefit if weight loss is your goal.

Just because I’m a virtual fitness coach doesn’t mean I don’t enjoy amazing meals.  I just tweak them to make them better for me.  This oatmeal brulee will make your taste buds jump for joy! 

If you love the taste of an oatmeal cookie, you’ll love the brown sugary, nutty, cinnamon, cranberry, and creamy taste of this delicious comforting, yet healthy meal. 

Banana Cranberry Oatmeal Brulee

brulee

  • 2 cups oatmeal
  • 1 3/4 cups milk
  • 1 tsp vanilla
  • 1 1/2 tsp cinnamon
  • 1/4 tsp sea salt
  • 1 tsp baking powder
  • 1 whole egg
  • 1 egg white
  • 1/4 cup brown sugar (sucanat, or coconut sugar)
  • 1 tbs organic grass fed butter
  • 8 walnuts halved
  • 1/4 cup dried cranberries
  • 1 medium banana

Grease a 9×13 dish with butter.  Preheat oven to 350 degrees.

In a small bowl whisk together the eggs.  Using a large bowl combine the oatmeal, milk, vanilla, cinnamon, baking powder, salt.  Add the eggs to this mixture, along with the walnuts and cranberries. 

Pour the oatmeal mixture into the lightly greased baking dish.  Top with sliced bananas. 

baked oatmeal

Bake for 35 minutes or until golden brown.  Remove from oven after 35 minutes and sprinkle the top evenly with the sugar.  Put back into the oven under the broiler for about 1 1/2 – 2 minutes until the top is a light brown crunchy top, resembling creme brulee. If you have a brulee torch have fun and use it instead.  (If you like your oatmeal creamy, add a touch of milk to your bowl before serving.)

For more great recipes, visit me at Fit Moms Fit Kids Club.

Have a healthy day,

Annett


Lemon Garlic Green Beans

Lemony Garlic Green Beans

Thanksgiving dinner wouldn’t be complete without a side of deliciously prepared fresh green beans!

Although green bean casserole is a classic favorite, for those with certain food allergies (or those counting calories), it’s not the best option to put on the table.

That’s why we love this simple, yet delectable dish that truly showcases the flavor of fresh green beans. In fact, this easy-to-make recipe is one we enjoy over and over throughout the year!

It’s just one of the many healthy, whole food Thanksgiving recipes I’m sharing over at The Nourishing Home this month. We hope you and your family enjoy it too!

Lemony Garlic Green Beans

2 pounds fresh green beans
2 tbsp butter, plus 1 tbsp olive oil (if DF, use 3 tbsp olive oil)
1-2 cloves garlic minced
2 tsp lemon zest
sea salt and pepper to taste

Snap off ends of green beans and rinse well; set aside. Prepare an ice-water bath in a large bowl. Bring a stockpot of salted water to a boil.

Add green beans to boiling water and cook until color is set and green beans are tender, about two minutes. Drain and transfer beans to ice-water bath to stop cooking. Drain again; set blanched green beans aside.

Melt butter in a large skillet over medium heat. Add the minced garlic and sauté until just fragrant, about one minute. Then, add the blanched green beans and lemon zest. Toss to well coat and rewarm the beans. Season to taste with sea salt and pepper. Transfer to a serving platter and enjoy! Serves 5-6.

Happy Thanksgiving blessings to you and yours,
Kelly at The Nourishing Home

Butternut Squash French Fries 2

Roasted Butternut Squash “French Fries”

Warning:  This recipe is not French, nor fried, and there are no potatoes in sight. 

In fact, it is made up entirely of a single orange vegetable with a strange name and nothing else.  But I’m willing to bet your kids, and hubbie, will eat it up as if it were otherwise!

I stumbled upon this phenomenon known as “French fried (insert food here)” earlier this year when I asked my daughter what she wanted for lunch. 

She gave her standard answer (chicken nuggets and French fries with ketchup) and I gave my standard answer (we don’t have nuggets or fries, and you can’t have just ketchup for lunch).

I wondered though… Could I make something else, call it a French fry and still earn smiles at the table?  Perhaps involving the kids in a small game of pretend by even serving ketchup?!

Sure enough, my hunch was right.  Follow this simple formula for getting kids (and picky parents) to eat their veggies without anyone questioning your motives:

  1. Slice any vegetable into strips
  2. Toss in oil, season and roast them in the oven
  3. Serve it to the family
  4. Call it a (insert food) French fry
  5. Ask if they would like ketchup with their fries

Of course this method works for potatoes too, but why not branch out and try to get the family to eat a variety of vegetables?  Use this pocket guide to purchase seasonal vegetables, put this easy side dish on the menu each week and aim to serve a different color.  Any vegetable would pair perfectly with delicious Panini-style grilled sandwiches – a frugal way to enjoy a sandwich and fries, any time of year!

INGREDIENTS
1 medium butternut squash
1/4 cup olive oil
2 Tbsp Italian seasoning
Coarse salt & pepper

METHOD
Wash and scrub the squash with all-natural produce wash.  Preheat oven to 400 degrees. 

Cut off the long, skinny neck of the squash, just where it meets the large, round base.  Trim off the tough outer skin of the squash.  (If the squash is awkward to handle, try cutting the long neck in half first.)

Cut the squash in quarters length-wise, and cut the remaining pieces into thick strips (similar to potato steak fries).

Scoop out the seeds from the round base of the squash, trim off the tough outer skin and cut this portion into thick strips as well.

In a large bowl, combine squash with olive oil and coat thoroughly.  Generously grind salt, pepper and Italian seasonings and stir to combine well.  Spread evenly over a cookie sheet and roast at 400 degrees for approximately 30-40 minutes, turning every 10-15 minutes, until the squash is cooked through.

Note:  Turning the squash encourages even cooking.  The squash will likely not be crispy and firm, so use caution.  You want them to remain intact for the “French fry” effect!

Have a blessed day!  Tiffany @ Don’t Waste the Crumbs

Healthy Frugal Spinach Salad 2

Healthy and Frugal Spinach Salad

Church potlucks are not known for their healthy fare and there’s a reason.  When you’re making a dish that serves 15-20 people, the cost of ingredients quickly add up. Quality produce and meat can be expensive, so we trim those out. 

Pasta and rice are inexpensive, so we add those in.  Plus, there’s the unwritten tradition that potluck dishes are baked and smothered with cheese. 

What we end up with is a very long table, lined up with orange 9″ x 13″ rectangles and everyone playing the “guess what’s inside” game.

I strive to bring a vegetable to every potluck, but I’m often low on frugal ideas that feed the masses.  My luck turned one day when I flipped over a bag of kale from Costco. 

The recipe on the bag was inspiring, but honestly, it used expensive ingredients:  sun-dried tomatoes, bacon and pine nuts?  Those are too rich for my potluck budget. 

With some easy substitutions and using ingredients I usually have on hand, I’ve created a healthy and frugal salad that is just as tasty with plenty of nutrition!

  • Spinach is a nutrition powerhouse, can be purchased in bulk and extras can be used at home in smoothies
  • Sunflower seeds are a good source of protein and more affordable than many cuts of meat. 
  • Onion adds a bit of crunch and jazz, while sweet, juicy tomatoes add a bit of fun. 
  • A sprinkle of Parmesan cheese adds a touch of class!

Be a rebel with me and break the rules.  At the next potluck, let’s bring something that’s completely opposite of tradition:  fresh, frugal,  green and delicious!  This spinach salad is just what every potluck table needs.  And who knows – maybe this one will spark a new tradition!

Healthy and Frugal Spinach Salad

4 cups of spinach, washed and dried (use this frugal, all-natural produce wash)
1/4 cup sunflower seeds
1/2 cup cherry tomatoes, halved
1/4 cup shredded Parmesan cheese
1/4 red or white onion, sliced thinly
1 cup cooked, chopped bacon (only if the budget allows!)

Dressing
1 clove garlic, crushed
2 Tbsp lemon or orange juice
1/2 cup olive oil (guide for buying/testing quality oil)
salt & pepper

Combine the salad ingredients in a large bowl.  Combine the salad dressing ingredients in a glass jar and shake together vigorously, or in a shallow bowl whisk together well.  Saturate the salad with the dressing and allow to stand for 15-30 minutes for the dressing to permeate the salad.  Toss again before serving.

Have a blessed day!  Tiffany @ Don’t Waste the Crumbs

Chicken

Chicken Tacos


These chicken tacos fall into the healthy, quick and easy category which makes them an ideal weeknight dinner. My husband and I love them for many reasons. Using tender shredded chicken thighs instead of ground beef as the base is not only more nutritious, but we think they make for a more interesting, chunkier taco. 


We pile on fresh cold veggies, with varying textures and levels of crunch, so they’re light and refreshing for hot summer nights.  I like to make the chicken in advance and store the shredded thighs in the fridge so that all I have to do at dinnertime is warm the tortillas and chop the vegetables. 


Tacos are also highly customizable (everyone makes their own!) so they are a good choice for guests or picky little eaters. 


I’ve listed some ideas for toppings, but really, anything goes! In the past I’ve thrown on some leftover cooked kale, squeezed a little lemon juice on top, and added a few torn basil leaves. Just don’t skimp on the vegetables, they truly are the best part.


Chicken Tacos


For the chicken:

1 package chicken thighs

1 onion

1 bay leaf

3-5 cloves garlic, slightly crushed with the flat part of your knife

1 tablespoon cumin

Salt and freshly ground pepper


Rinse the chicken and put it in a medium-sized pot, along with the rest of the ingredients.  Add enough water to cover all of the chicken. You can add more or less of each of these ingredients, or simply simmer the chicken in salted water–the aromatics and spices lend a subtle flavor to the chicken. Bring to a low boil, cover partially, and cook for about 30 minutes or until the chicken is tender and falling apart. Let cool and then shred with your fingers or a fork, discarding any excess fat.


For the tacos, heat up several tortillas (corn, flour, spinach–whatever you like!) wrapped in tin foil in a 350-degree oven.


You can use any kind of taco toppings you like, but here are some of our favorites:

Sour cream

Salsa

Cheese (feta, shredded cheddar or Monterey jack)

Sliced green, red, yellow, or orange bell peppers

Pickled jalapeno and banana peppers

Shredded red cabbage

Diced tomatoes

Mashed avocado

Diced cucumbers

Fresh spinach or arugula


 DSC05197